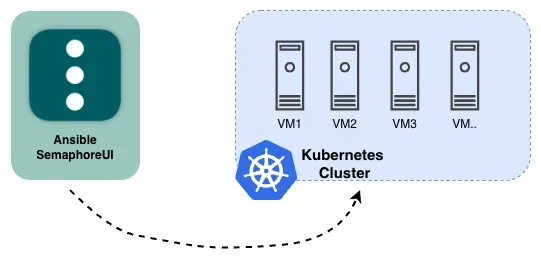
Provisioning Kubernetes with SemaphoreUI and Kubespray: Automating Cluster Deployment
Semaphore UI is an open-source web-based interface for managing and automating Ansible tasks and CI/CD workflows. It allows DevOps engineers to visually organize playbooks, run commands, and monitor automation pipelines without complex terminal operations. This makes it a powerful tool for simplifying infrastructure deployment, especially when combined with Kubespray, an Ansible-based Kubernetes installer.
In this article, we’ll walk you through how to install and deploy Kubernetes using SemaphoreUI and Kubespray — from setting up your inventory and playbooks to running automated tasks via Semaphore pipelines. This approach not only reduces manual effort but also ensures repeatable, consistent, and production-ready Kubernetes deployments suitable for DevOps teams and cloud-native environments.
Topology
Lab Details
Kubernetes Version: v1.31.9
ETCD : Kubeadm
CNI: Calico
CRI: Containerd
OS: Ubuntu 22.04.5 LTS
| IP | Hostname |
|---|---|
| 10.10.61.21 | k8s-master-01 |
| 10.10.61.22 | k8s-master-02 |
| 10.10.61.23 | k8s-master-03 |
| 10.10.61.25 | k8s-worker-01 |
| 10.10.61.26 | k8s-worker-02 |
Prerequisites
- SemaphoreUI installed
- All Kubernetes nodes can connect to each other via passwordless SSH
Preparation
- Go to the terminal where
SemaphoreUIis located, then clone kubespray. This lab uses Docker
docker exec -it  semaphore-semaphore-1 sh
git clone https://github.com/kubernetes-sigs/kubespray /tmp/kubespray
cd /tmp/kubespray- Then switch to the
release-2.27branch and installrequirements.txt
/tmp/kubespray $ git checkout release-2.27
/tmp/kubespray $ pip install -U -r requirements.txt
Deploy Steps
- The first step is to create a project in the Semaphore UI.
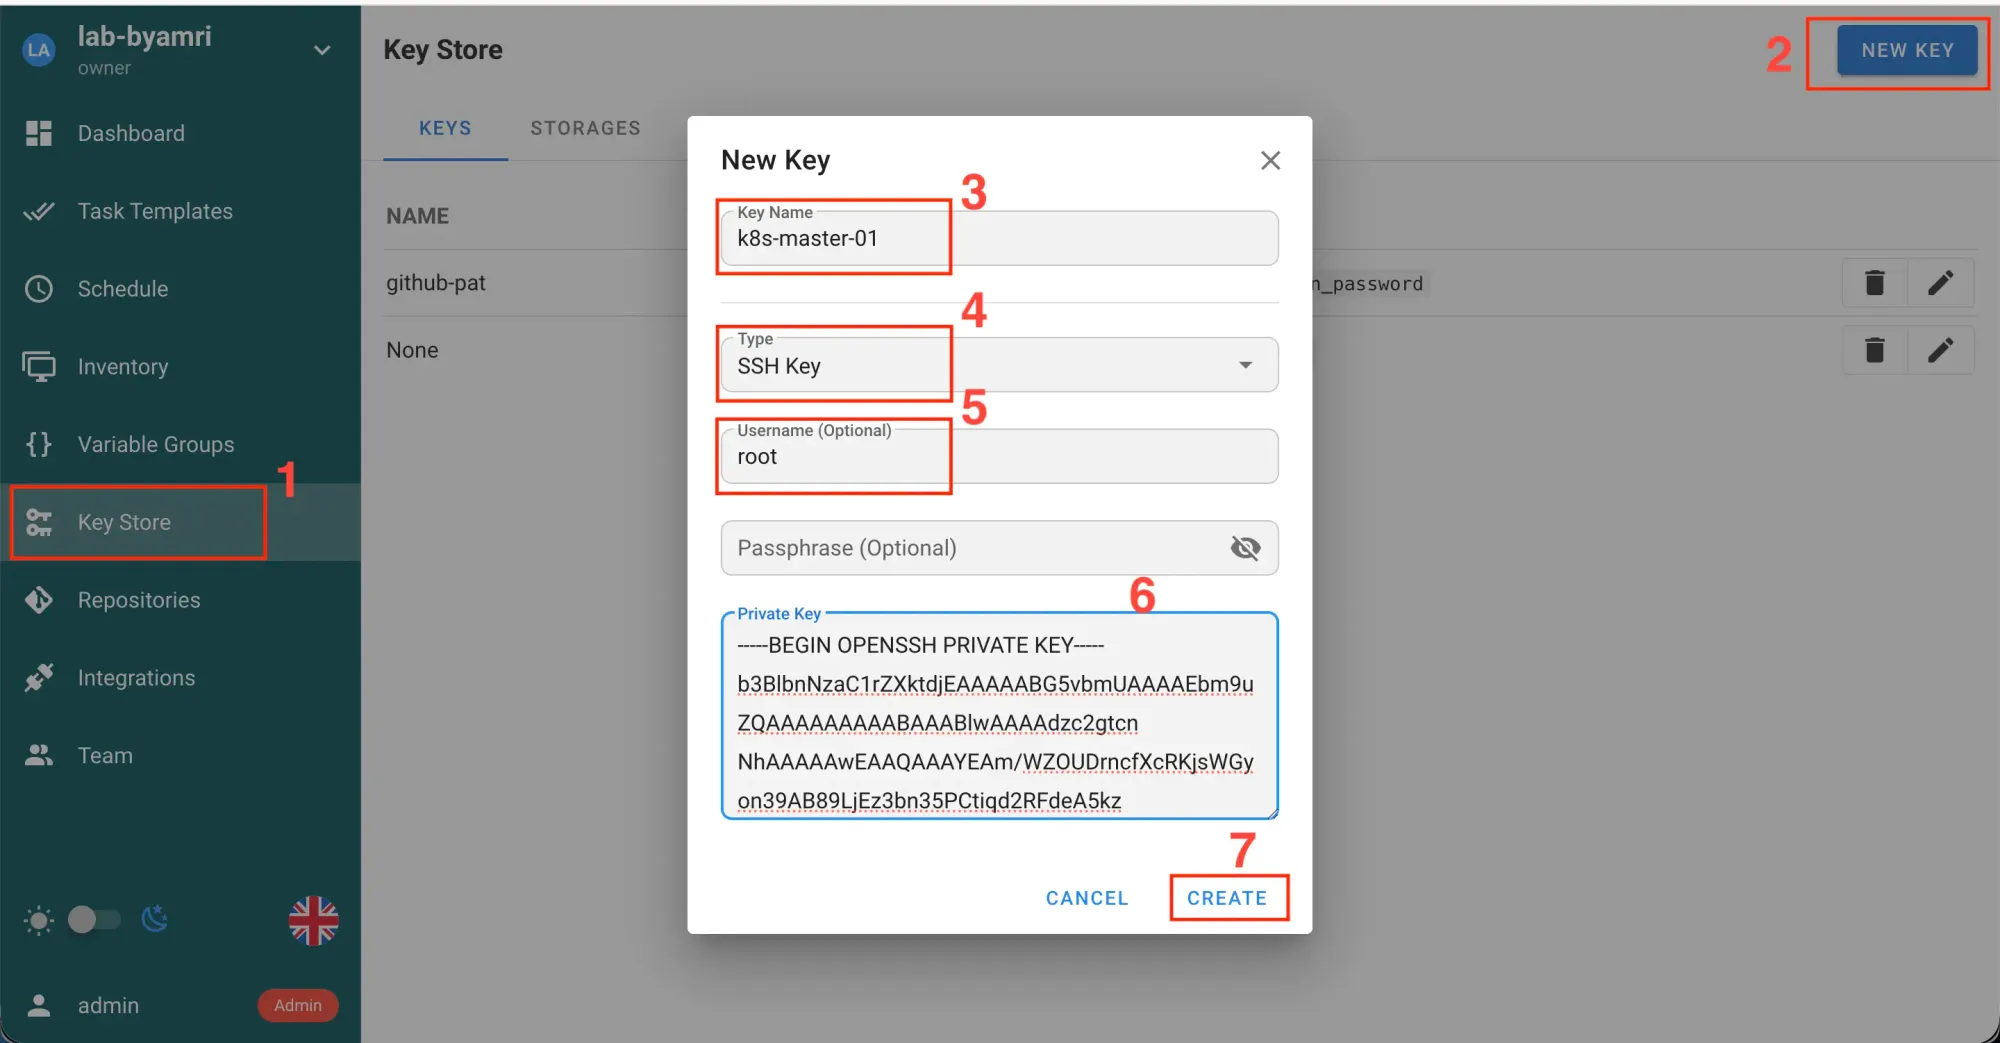
- Then, copy the
PrivateKeyfromk8s-master-01as a jumphost for SSH to all nodes.
cat ~/.ssh/id_rsa
...
-----BEGIN OPENSSH PRIVATE KEY-----
...
...
...
-----END OPENSSH PRIVATE KEY-----
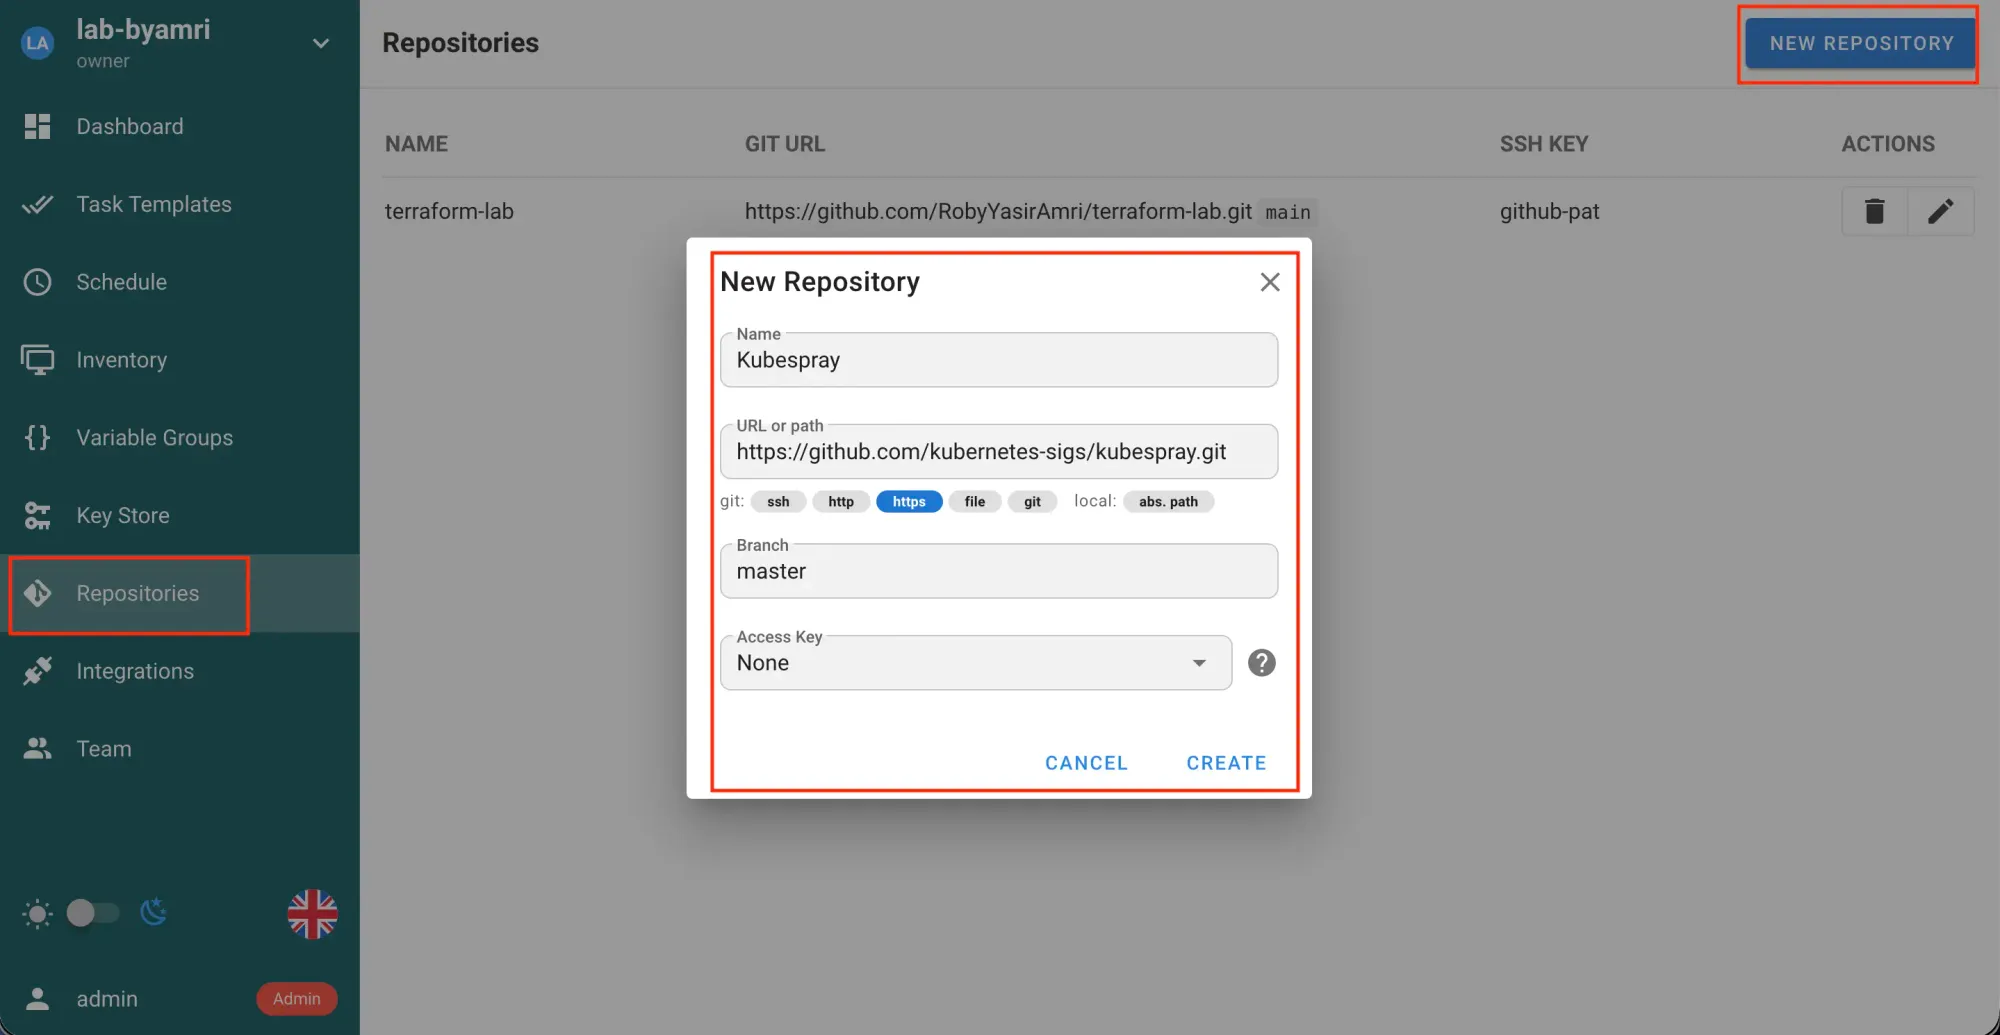
- Then, create a repository.
Click Repository → NEW REPOSITORY-> SAVE
- Create
Inventoryto include all hosts
Click Inventory → Ansible Inventory → NEW INVENTORY → Create
all:
  hosts:
    k8s-master-01:
      ansible_host: 10.10.61.21
      ip: 10.10.61.21
      access_ip: 10.10.61.21
      short_hostname: master-01
      node_taints:
        - "node-role.kubernetes.io/control-plane=:NoSchedule"
    k8s-master-02:
      ansible_host: 10.10.61.22
      ip: 10.10.61.22
      access_ip: 10.10.61.22
      short_hostname: master-02
      node_taints:
        - "node-role.kubernetes.io/control-plane=:NoSchedule"
    k8s-master-03:
      ansible_host: 10.10.61.23
      ip: 10.10.61.23
      access_ip: 10.10.61.23
      short_hostname: master-03
      node_taints:
        - "node-role.kubernetes.io/control-plane=:NoSchedule"
    k8s-worker-01:
      ansible_host: 10.10.61.25
      ip: 10.10.61.25
      access_ip: 10.10.61.25
      short_hostname: worker-01
      node_labels:
        node-role.kubernetes.io/worker: ""
        type: "app"
    k8s-worker-02:
      ansible_host: 10.10.61.26
      ip: 10.10.61.26
      access_ip: 10.10.61.26
      short_hostname: worker-02
      node_labels:
        node-role.kubernetes.io/worker: ""
        type: "app"
  children:
    kube_control_plane:
      hosts:
        k8s-master-01:
        k8s-master-02:
        k8s-master-03:
    kube_node:
      hosts:
        k8s-master-01:
        k8s-master-02:
        k8s-master-03:
        k8s-worker-01:
        k8s-worker-02:
    etcd:
      hosts:
        k8s-master-01:
        k8s-master-02:
        k8s-master-03:
    k8s_cluster:
      children:
        kube_control_plane:
        kube_node:
    calico_rr:
      hosts: {}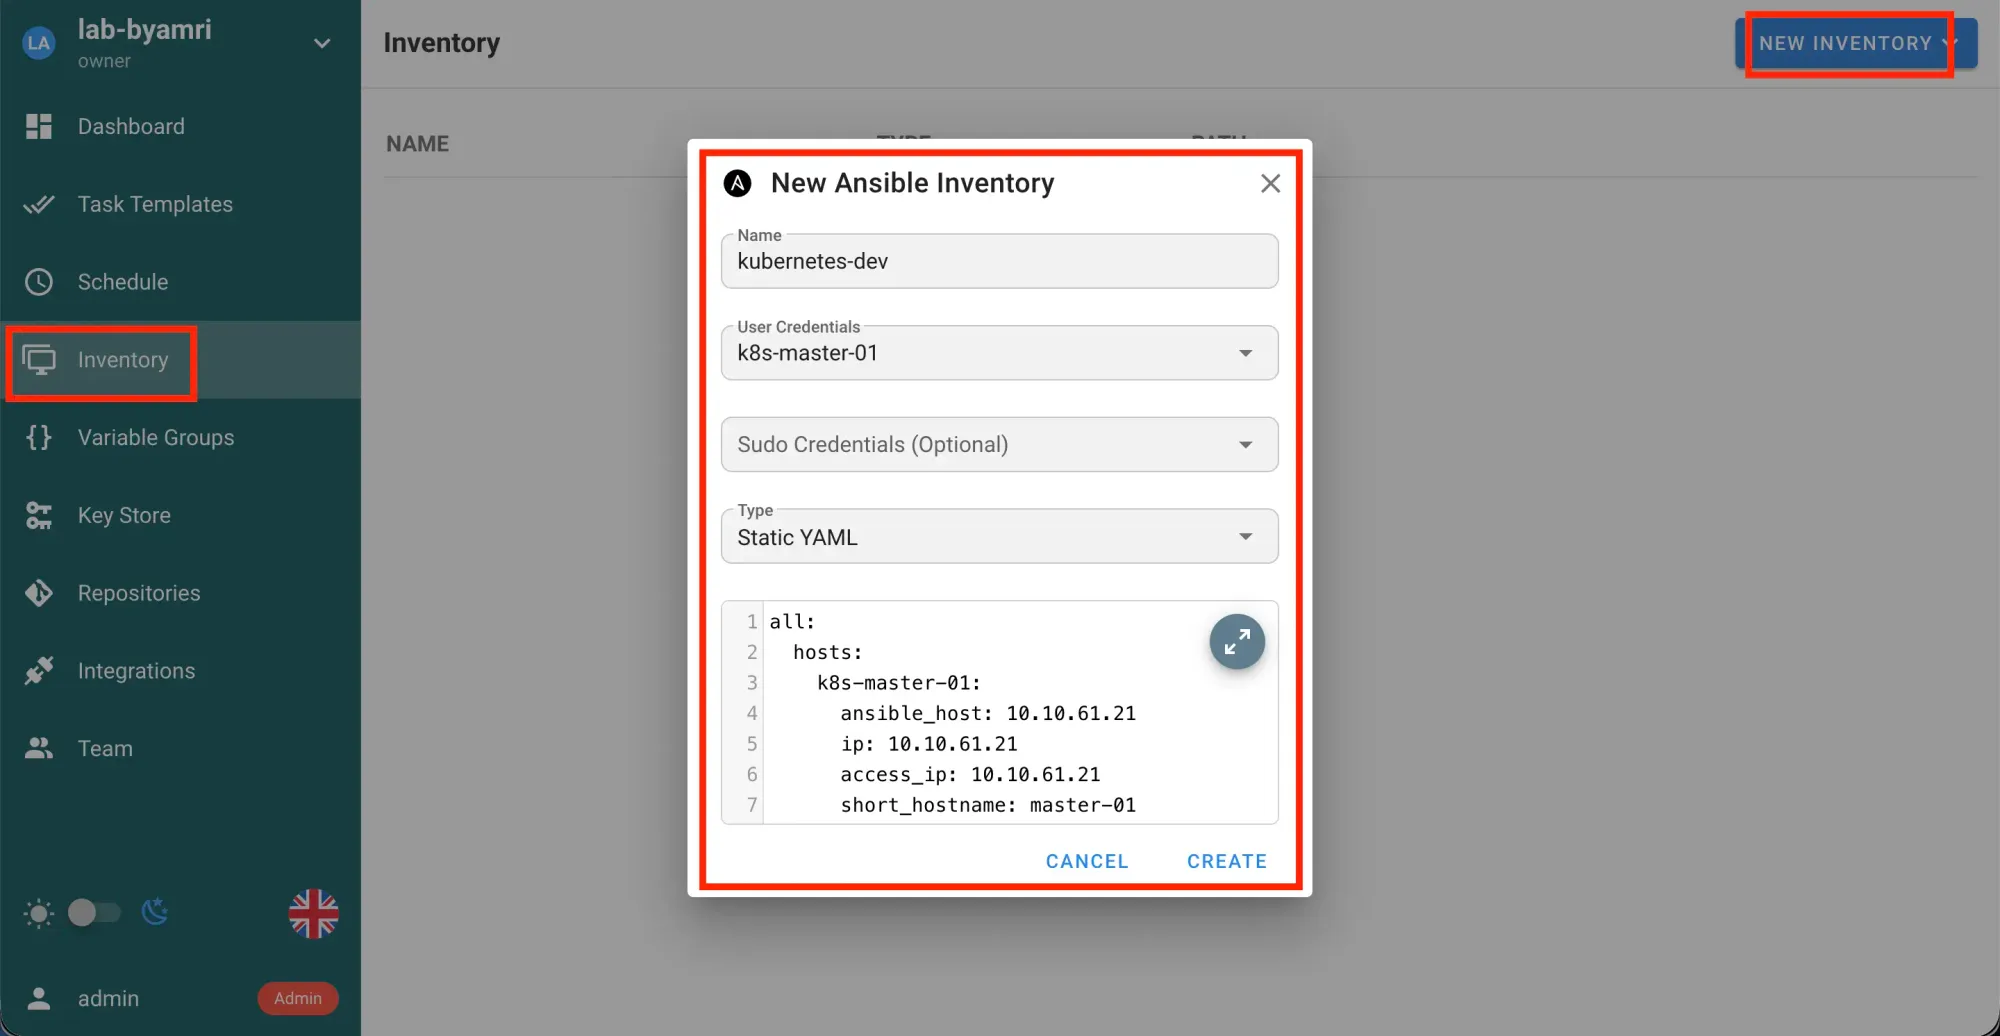
- Then create
Environmentto define the cluster version, name clusters, etc.
Click Variable Groups → NEW GROUP → SAVE
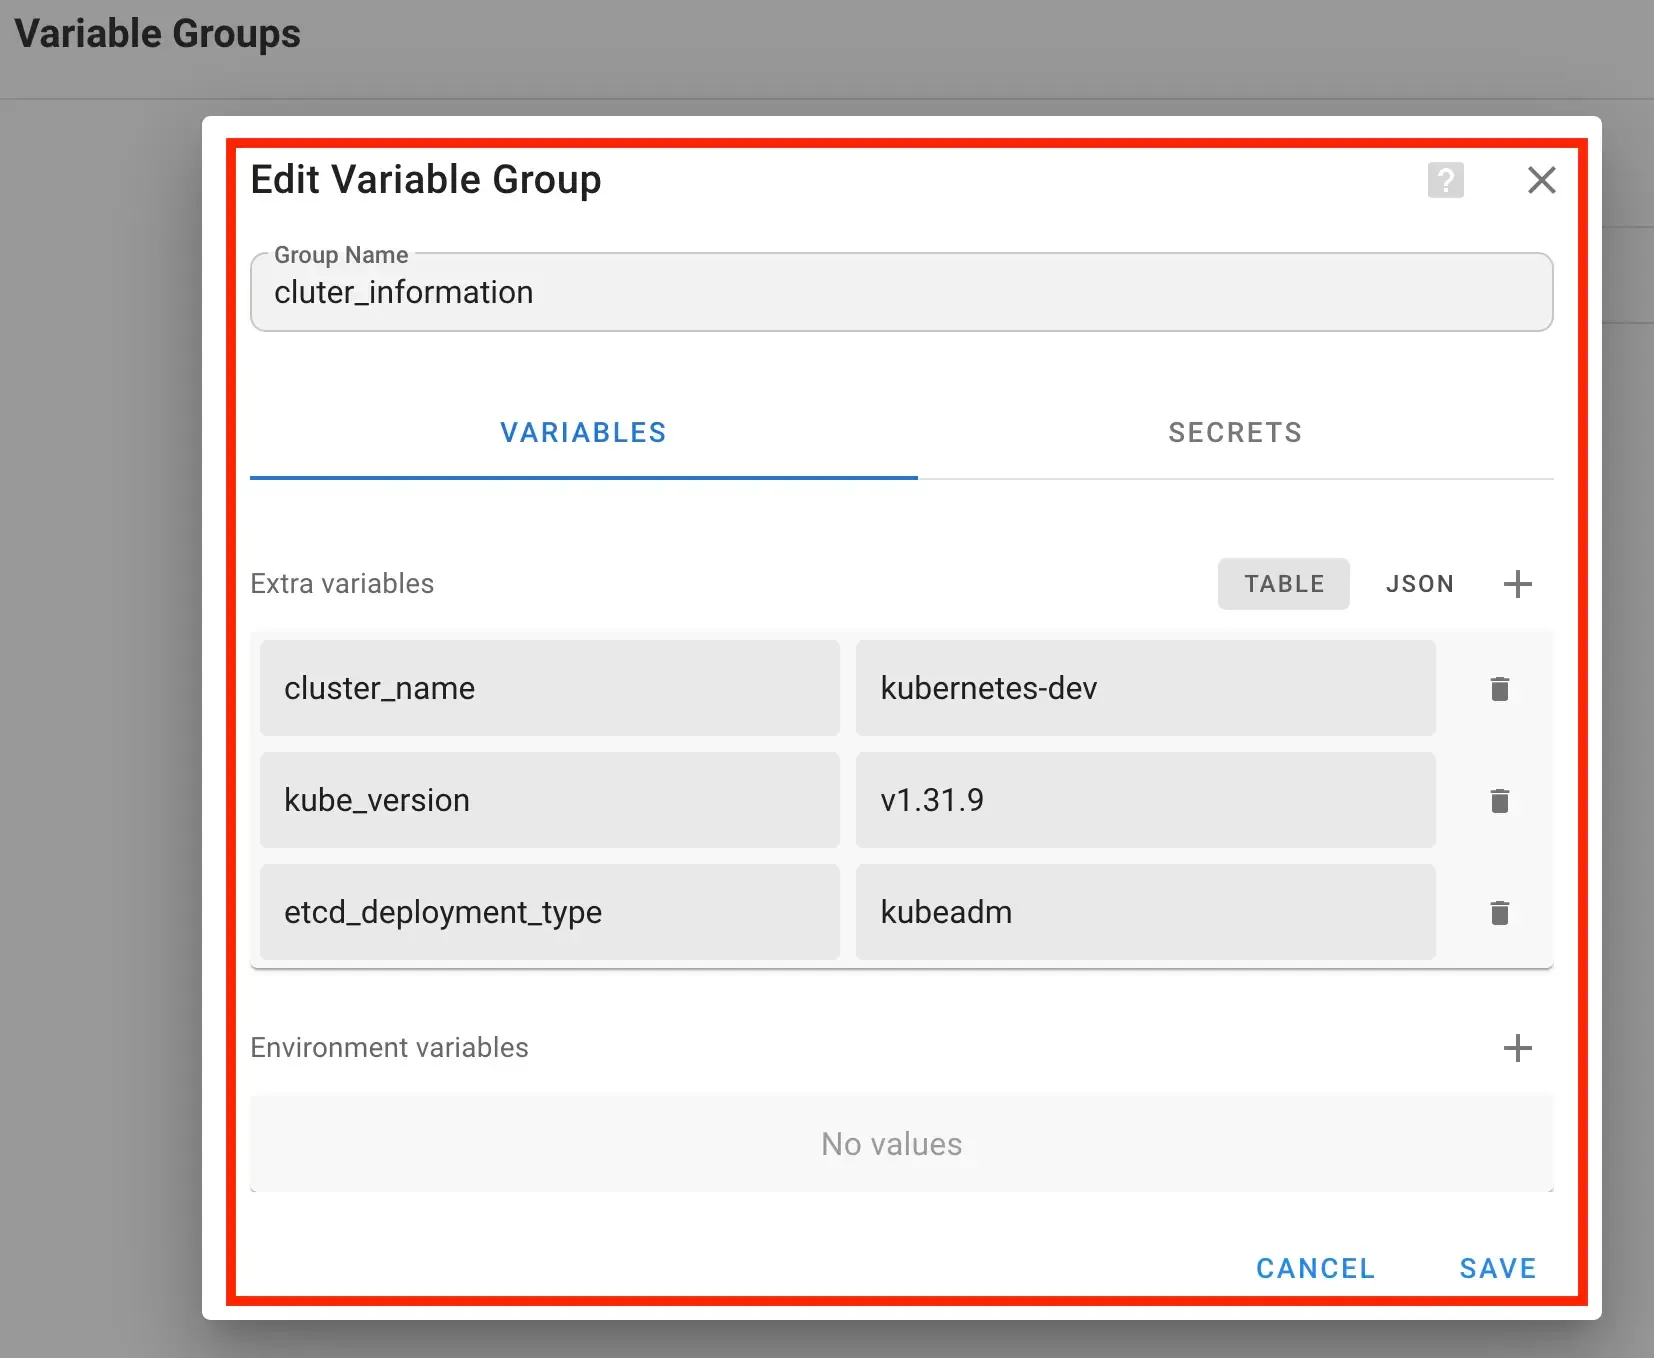
etcd_deployment_type uses kubeadm so that etcd is a static manifest, not systemdSource: https://github.com/kubernetes-sigs/kubespray/blob/master/docs/operations/etcd.md#kubeadm
- Create a template:
Task Templates→New Template→Ansible Playbook→ Input Value →Create
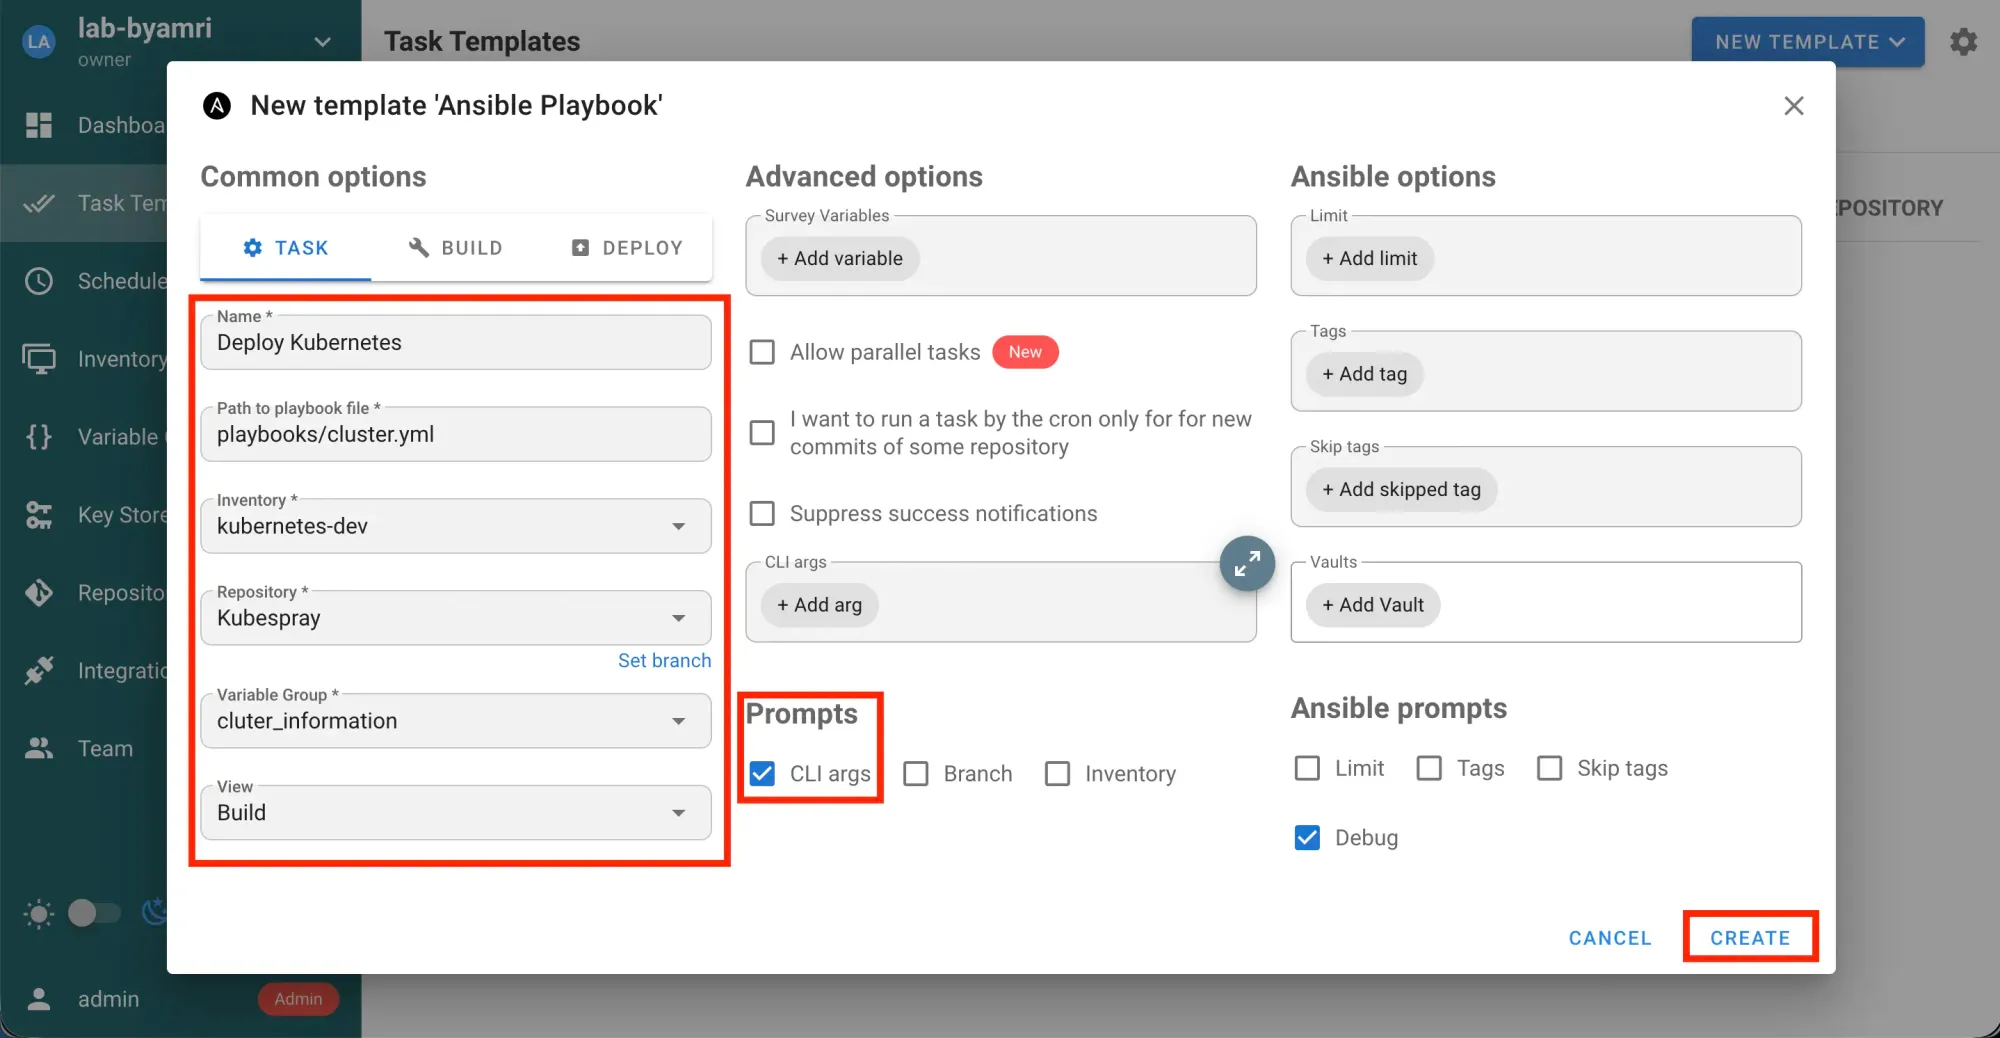
Deploy Cluster
- Select
Task Templatesand clickDeploy Kubernetes→RUN
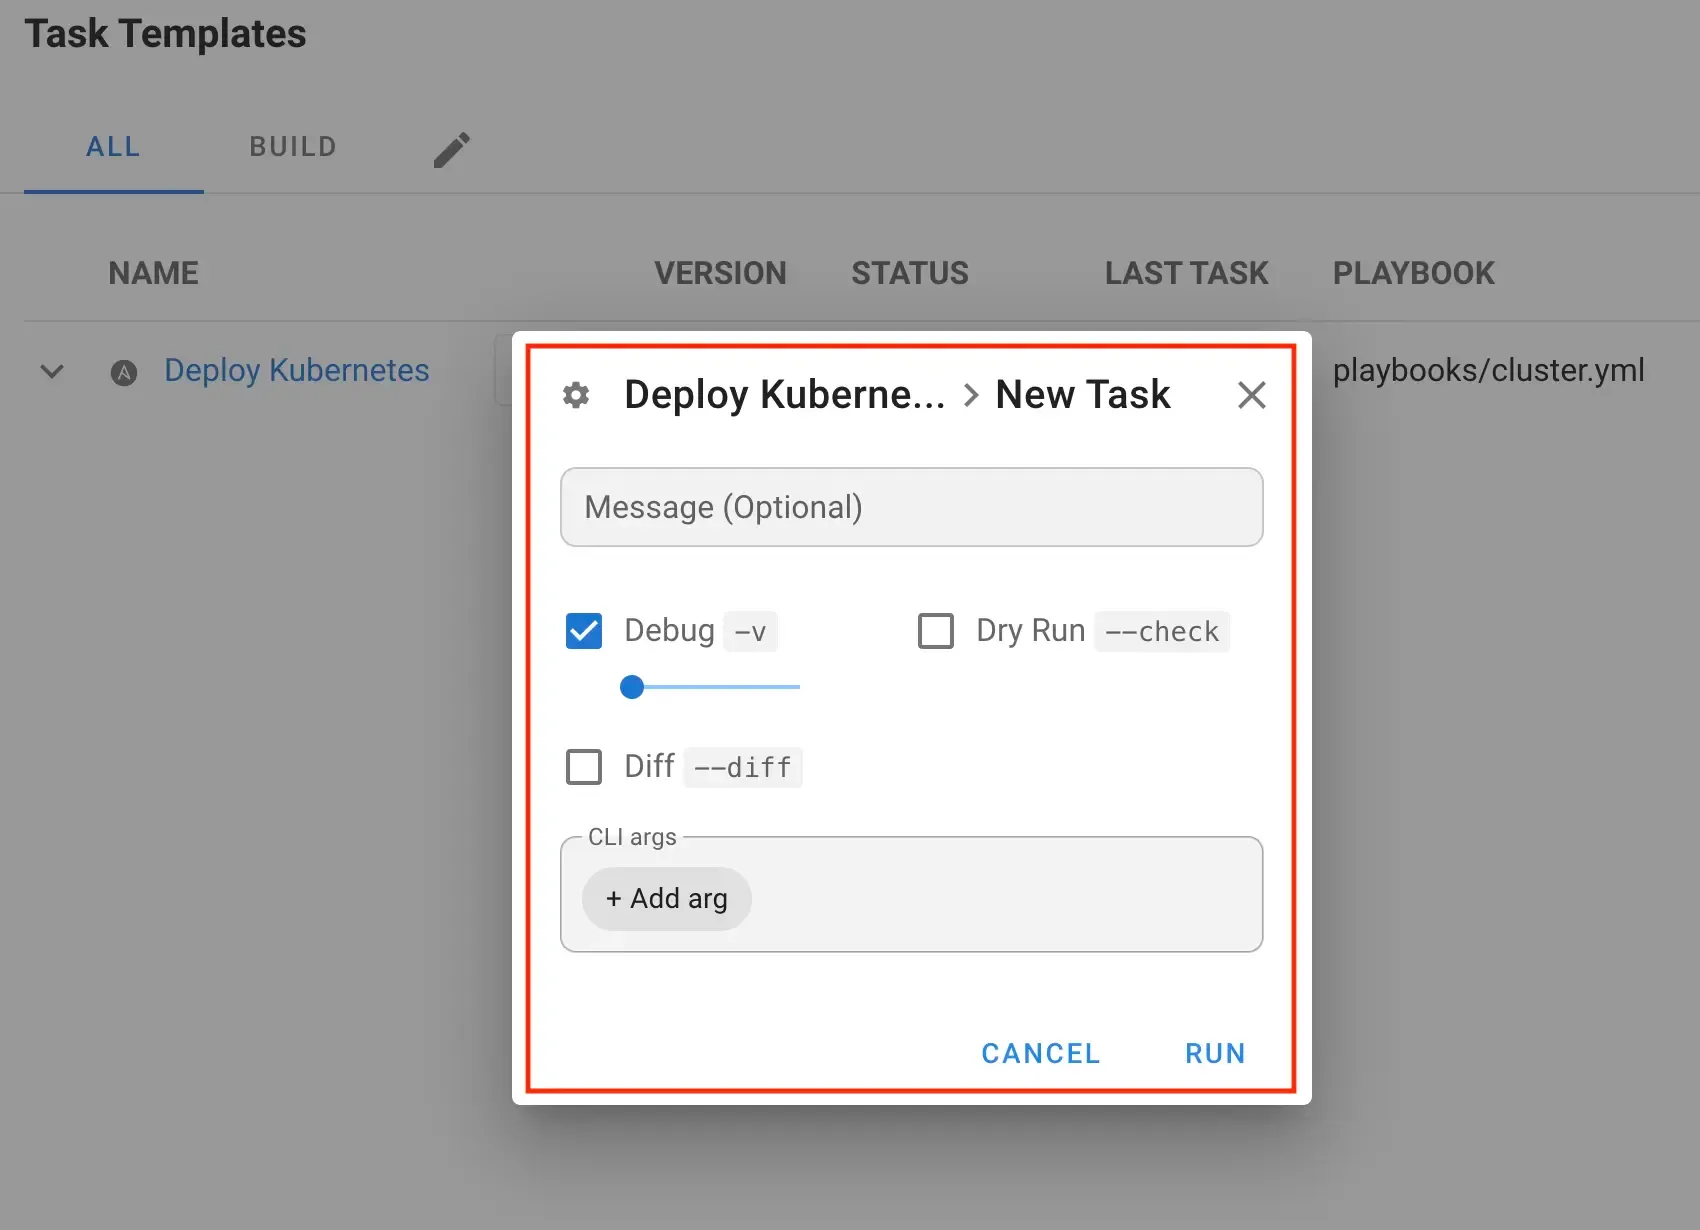
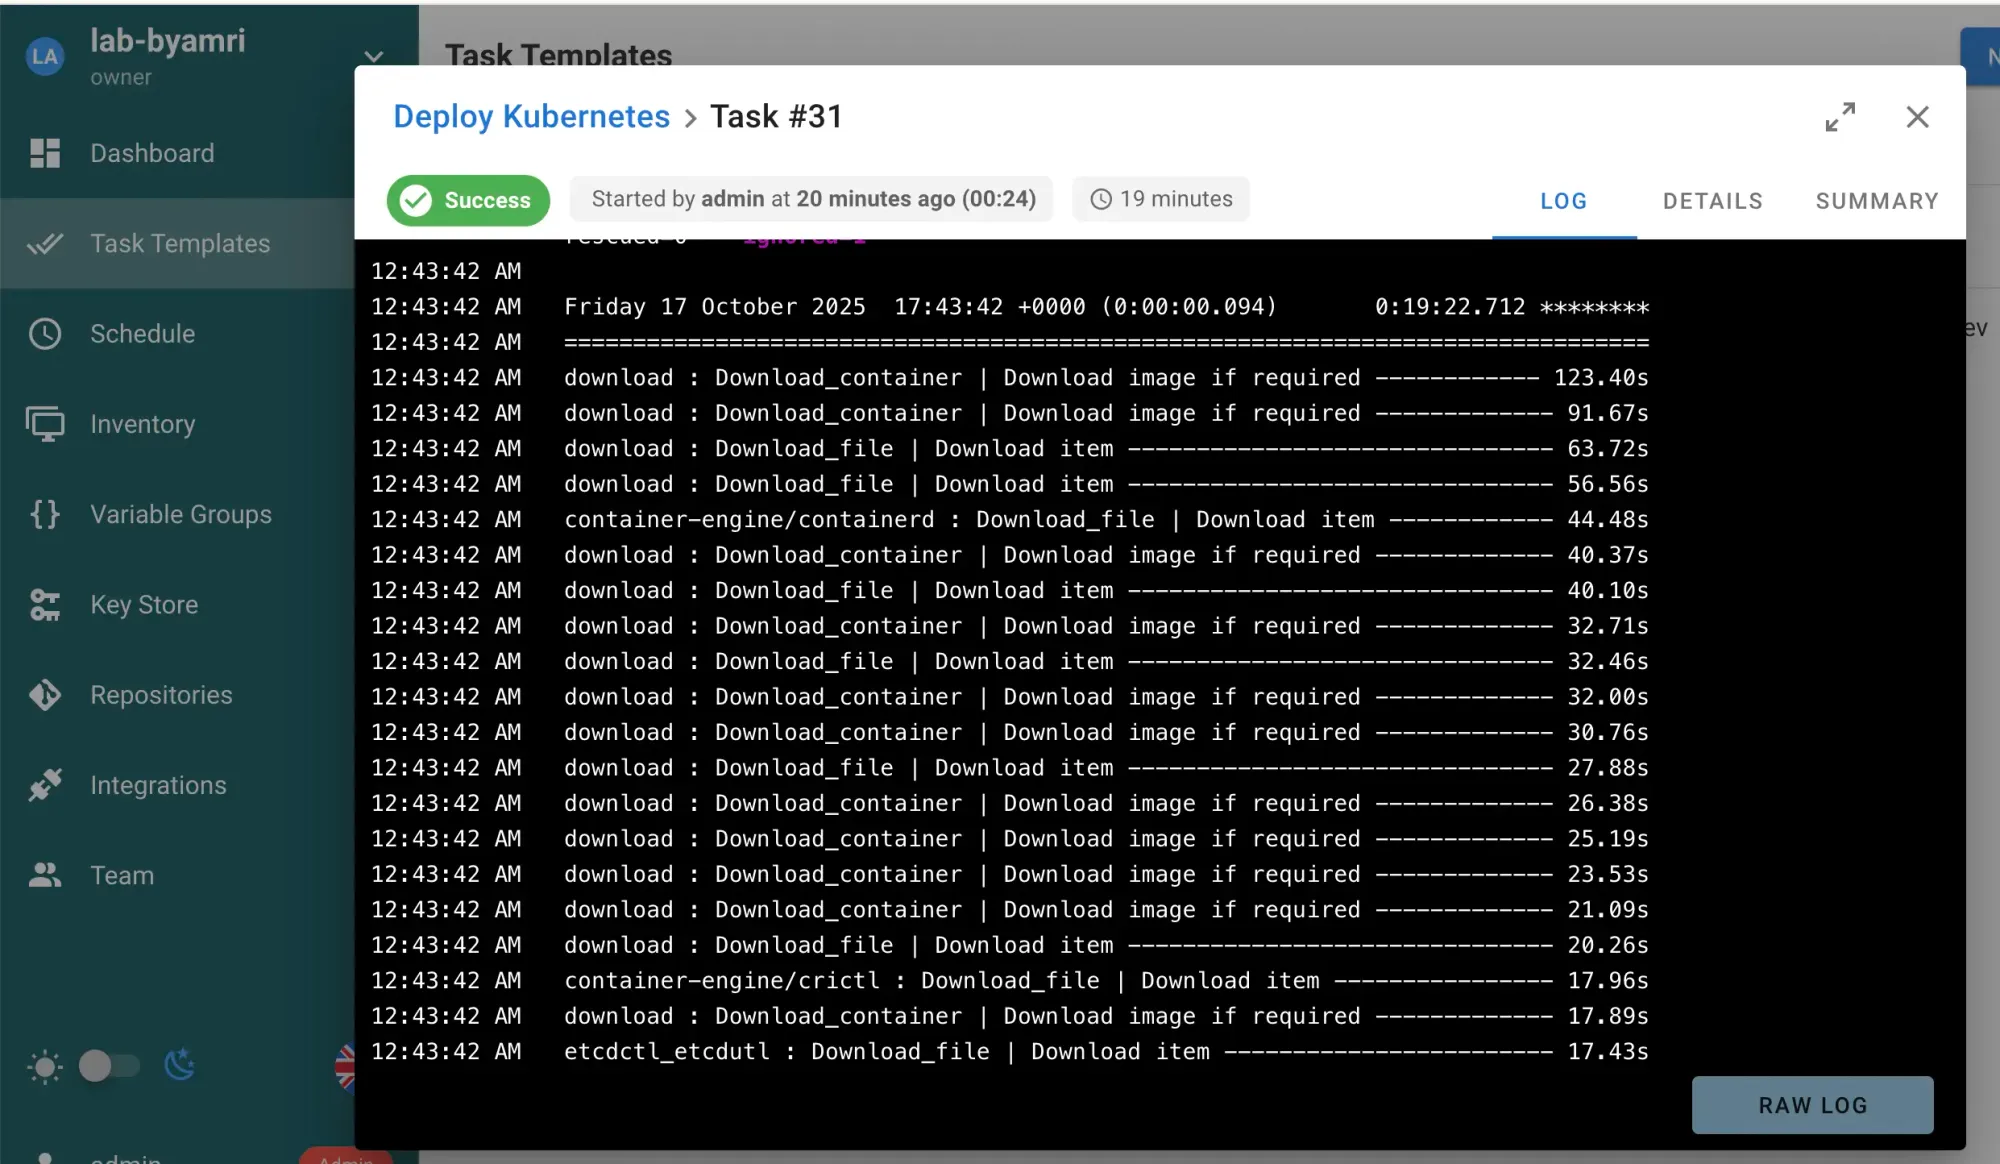
- Wait for the deployment process to complete
Verification
- Check the node status

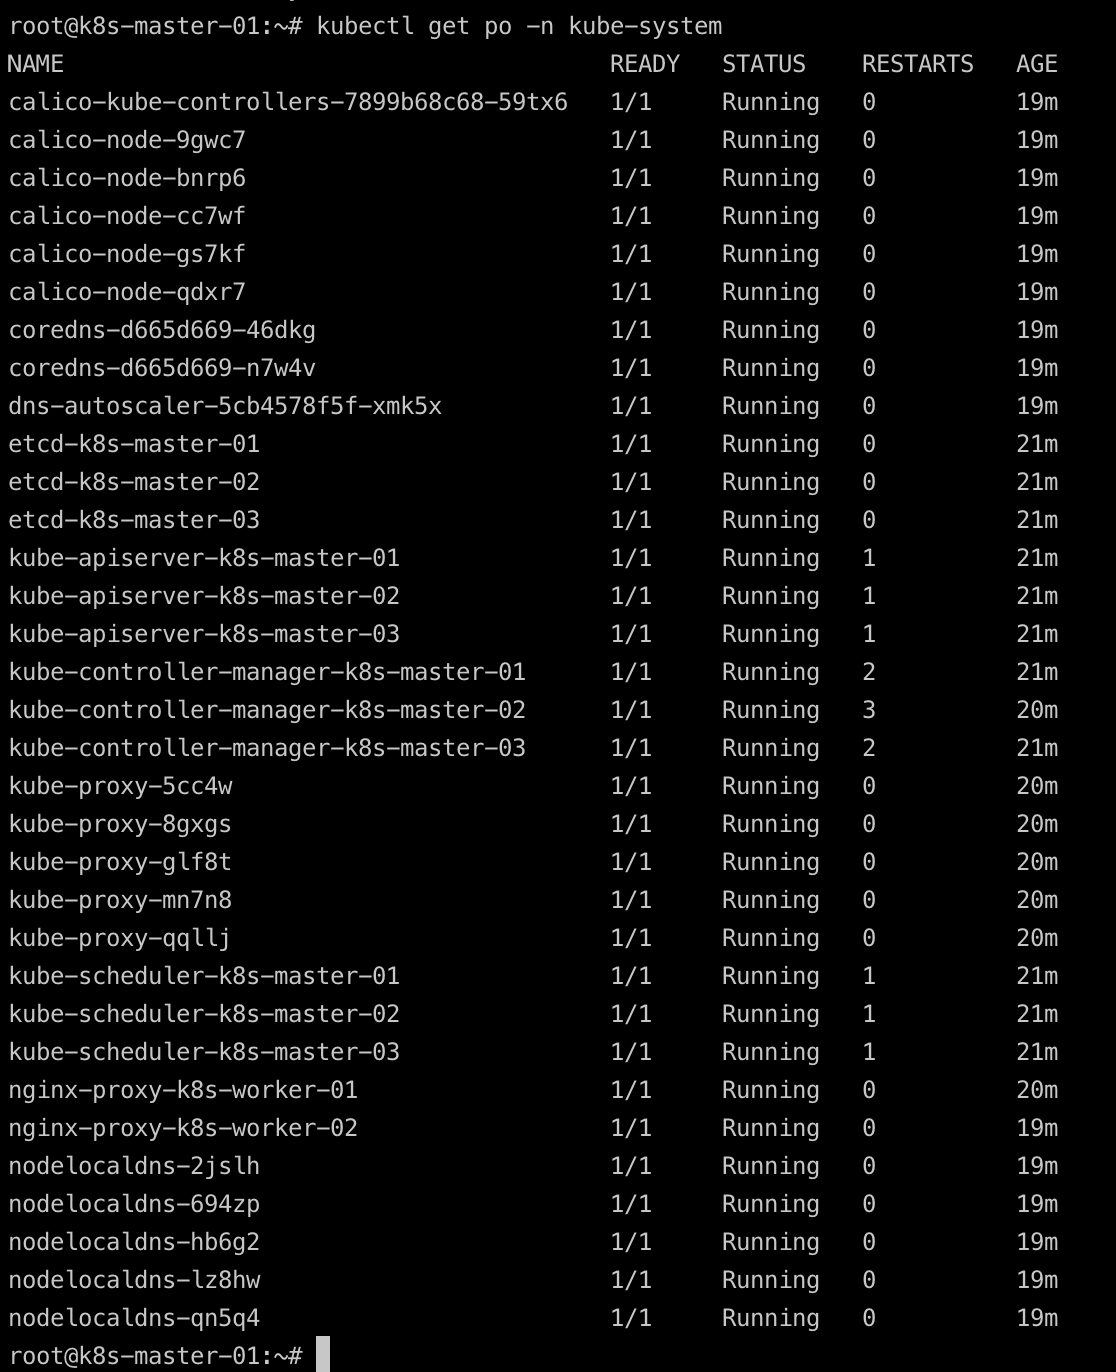
- Check kube-system pods
By combining SemaphoreUI and Kubespray, deploying Kubernetes becomes more efficient, consistent, and less error-prone. This automation-driven approach not only simplifies infrastructure management but also accelerates your CI/CD workflows — helping teams focus more on innovation rather than manual configuration.