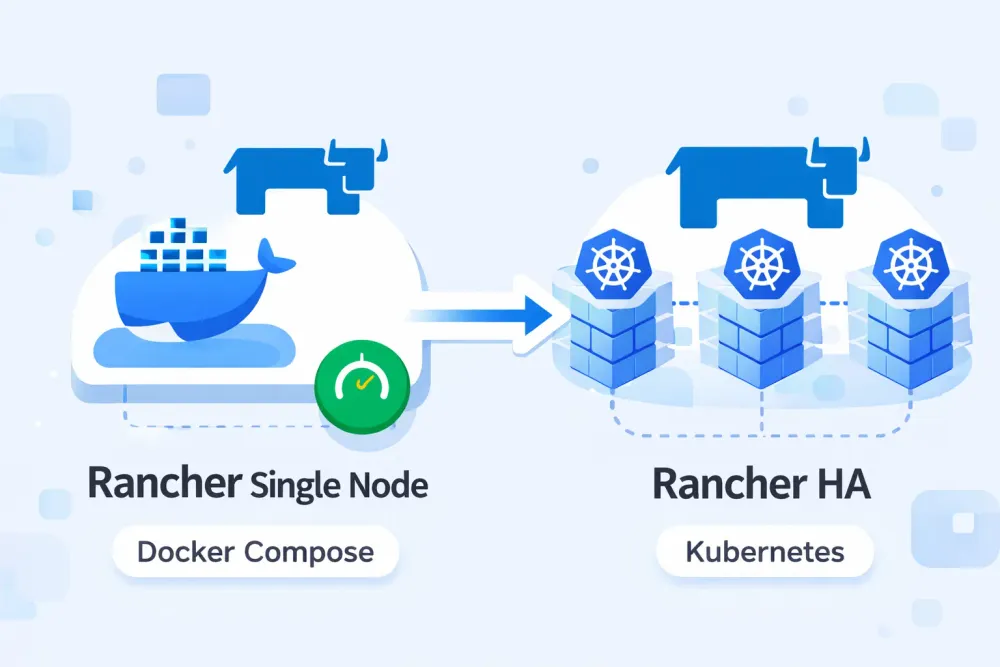
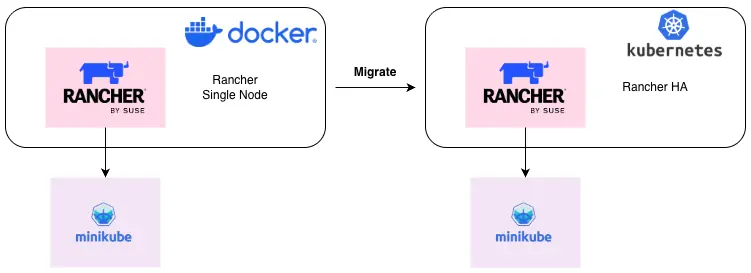
Migrate Rancher Docker to Kubernetes HA
Over the past few days, I was assigned a task to conduct a lab simulation for migrating Rancher from a single-node deployment to a highly available (HA) Rancher setup running on a Kubernetes cluster. The main challenge encountered during this process was that the existing single-node Rancher instance was still using a static IP address to register Kubernetes agents. As a result, after the migration, the agents were unable to reconnect and remained in an Unavailable state, since the new Rancher instance running on Kubernetes was exposed using a different IP address. Therefore, a repointing process was required to ensure that the Kubernetes agents could successfully reconnect to the new Rancher server.
Environment
- Rancher v2.9.3
- Kubernetes v1.30
“Before performing the migration, ensure that the target Kubernetes version is compatible with the existing Rancher version.”

Deploy Rancher Single Node
- Run the following
docker-compose.yamlfile to deploy Rancher:
version: '3.8'

services:
  rancher:
    image: rancher/rancher:v2.9.3
    environment:
      - TZ=Asia/Jakarta
      - AUDIT_LEVEL=1
    container_name: rancher
    restart: unless-stopped
    privileged: true
    ports:
      - "80:80"
      - "443:443"
    volumes:
      - ./rancher:/var/lib/rancher
      - /var/log/rancher/auditlog:/var/log/auditlog
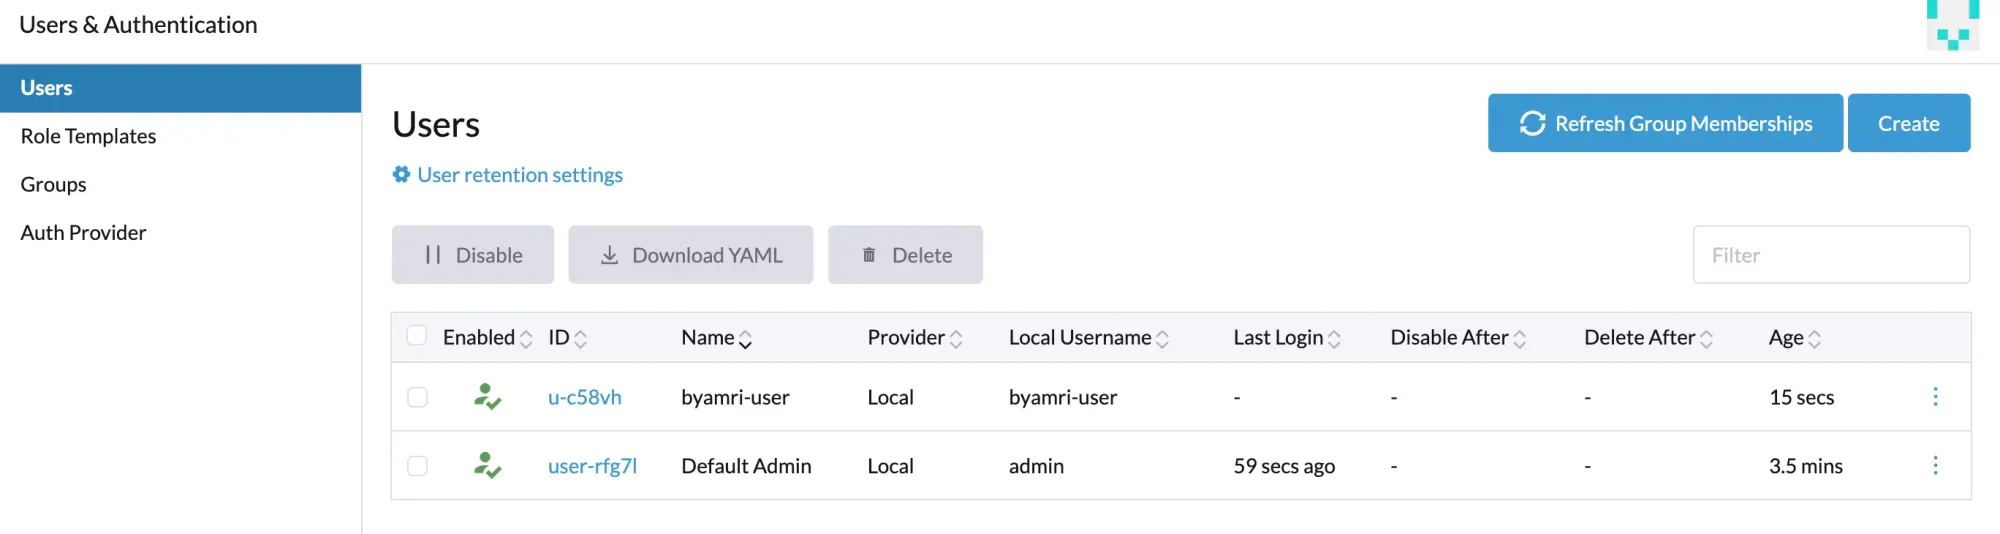
- After Rancher is running properly, perform validation by creating users .
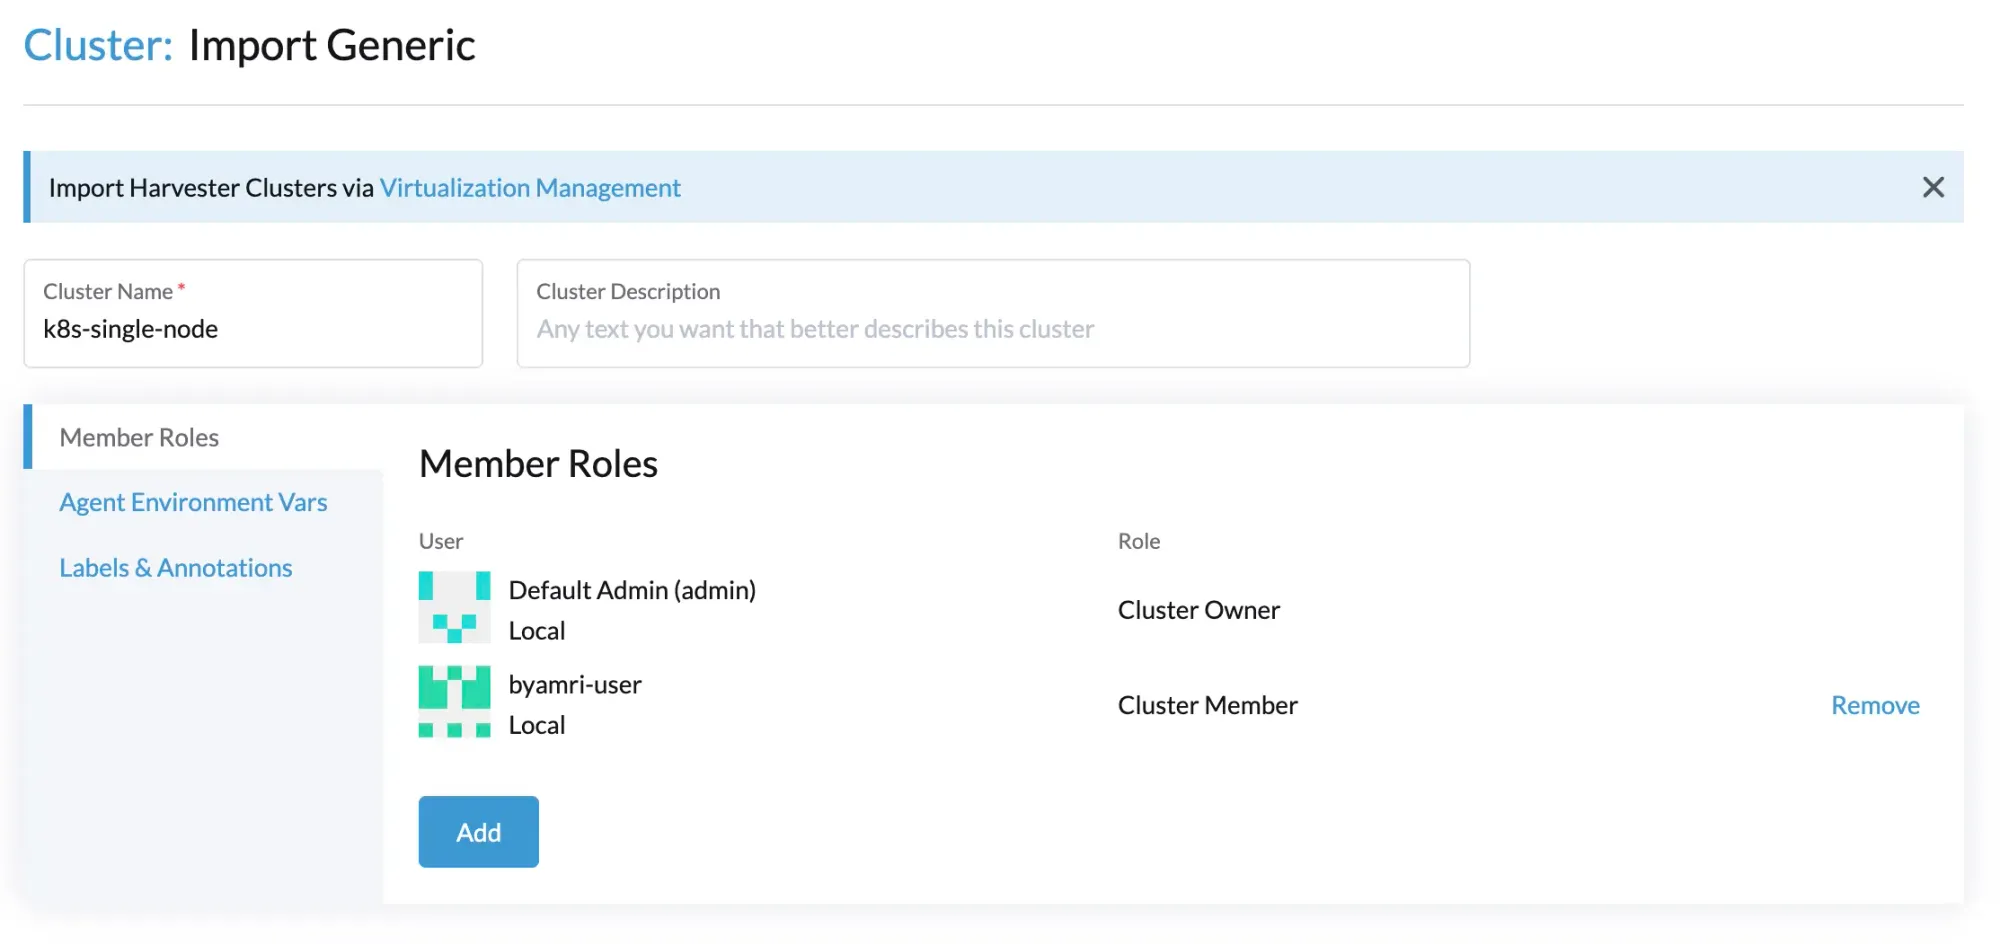
- Import the Kubernetes cluster using
minikube.

- Wait until the cluster status changes to
Active.
Backup Rancher Single Node Data
The backup process requires downtime, and the duration of the downtime depends on the amount of data stored in Rancher.
Note: This back-up will only serve as a last resort to restore your current single node docker install if something goes wrong. This back-up can not be used to migrate your SND install to a kubernetes cluster.
- Stop the Rancher container.
docker stop rancher
- Use the following command to create a data container from the Rancher container that was just stopped. Replace each placeholder as needed.
docker create --volumes-from rancher --name rancher-data-$(date +%Y_%m_%d) rancher/rancher:v2.9.3
After running this command, a new container will be created with a name similar to rancher-data-2026_01_10.

- From the data container that was just created (
rancher-data-<DATE>), create a backup tarball (rancher-data-backup-<RANCHER_VERSION>-<DATE>.tar.gz) using the following command:
docker run --name busybox-backup-$(date +%Y_%m_%d) --volumes-from rancher-data-$(date +%Y_%m_%d) -v $PWD:/backup:z busybox tar pzcvf /backup/rancher-data-backup-v2.9.3-$(date +%Y_%m_%d).tar.gz /var/lib/rancher
Wait until the backup process is completed.

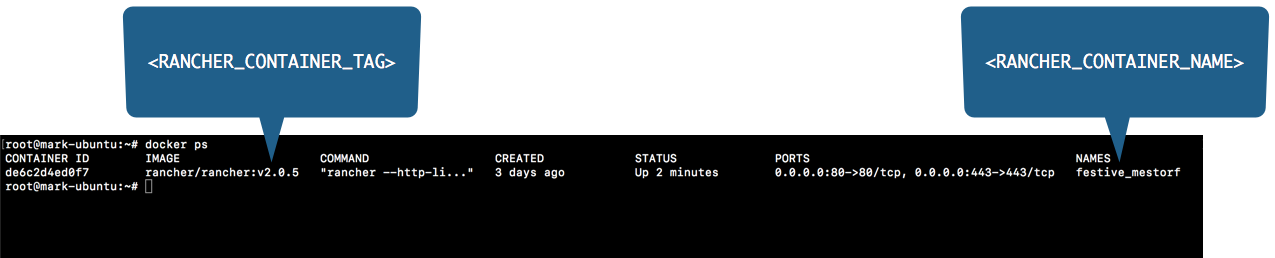
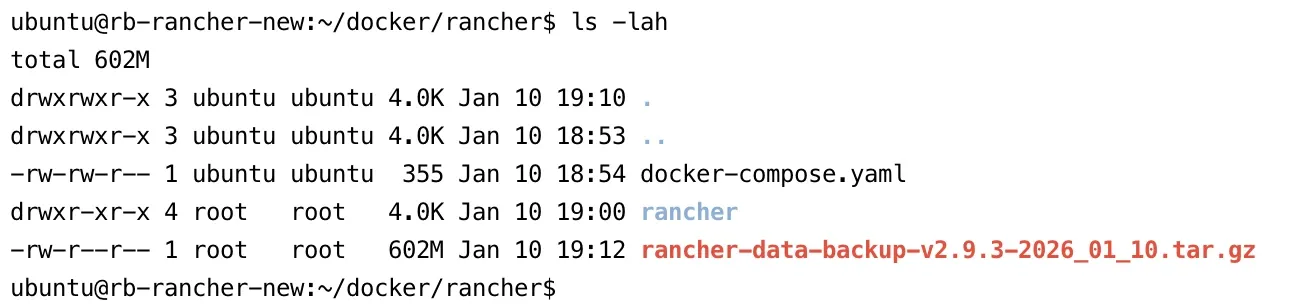
- Run the
lscommand to verify that the backup tarball has been successfully created. The file name should be similar torancher-data-backup-<RANCHER_VERSION>-<DATE>.tar.gz.
- Move the backup tarball to a secure location outside of the Rancher server. Then, remove the
rancher-data-<DATE>andbusybox-backup-<DATE>containers from the Rancher server.
docker rm rancher-data-$(date +%Y_%m_%d)
docker rm busybox-backup-$(date +%Y_%m_%d)

- Restart the Rancher server by starting the Rancher container.
docker start rancher

Rancher UI Section
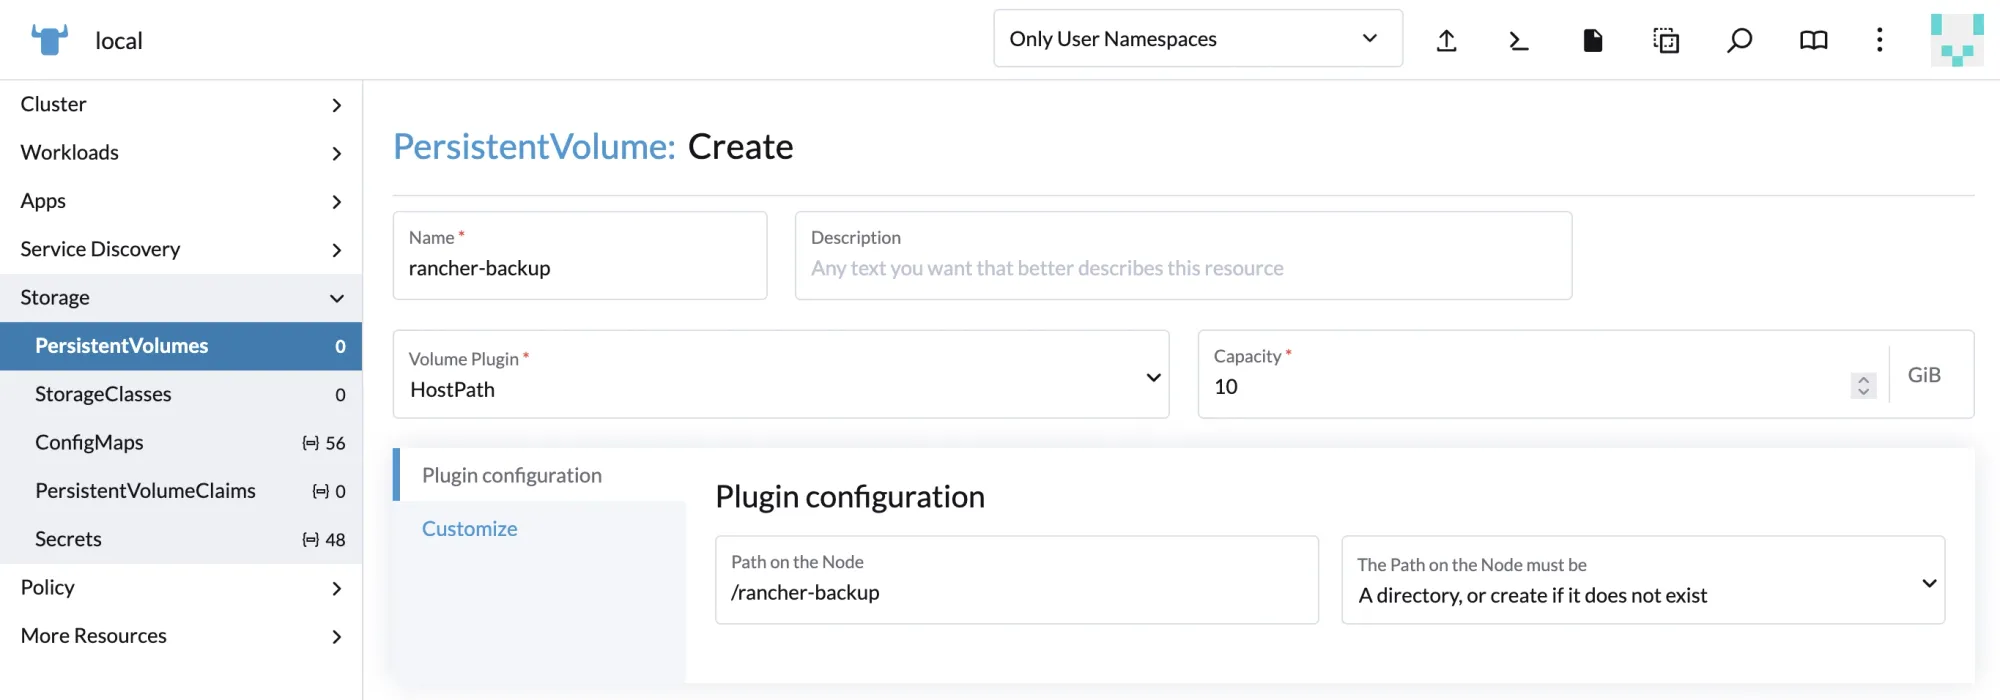
1. Create Backup Persistent Volume (PV)
Navigate to Cluster Management → click Explore on the local cluster → select Storage → click Persistent Volume → Create, then follow the configuration shown in the images below.

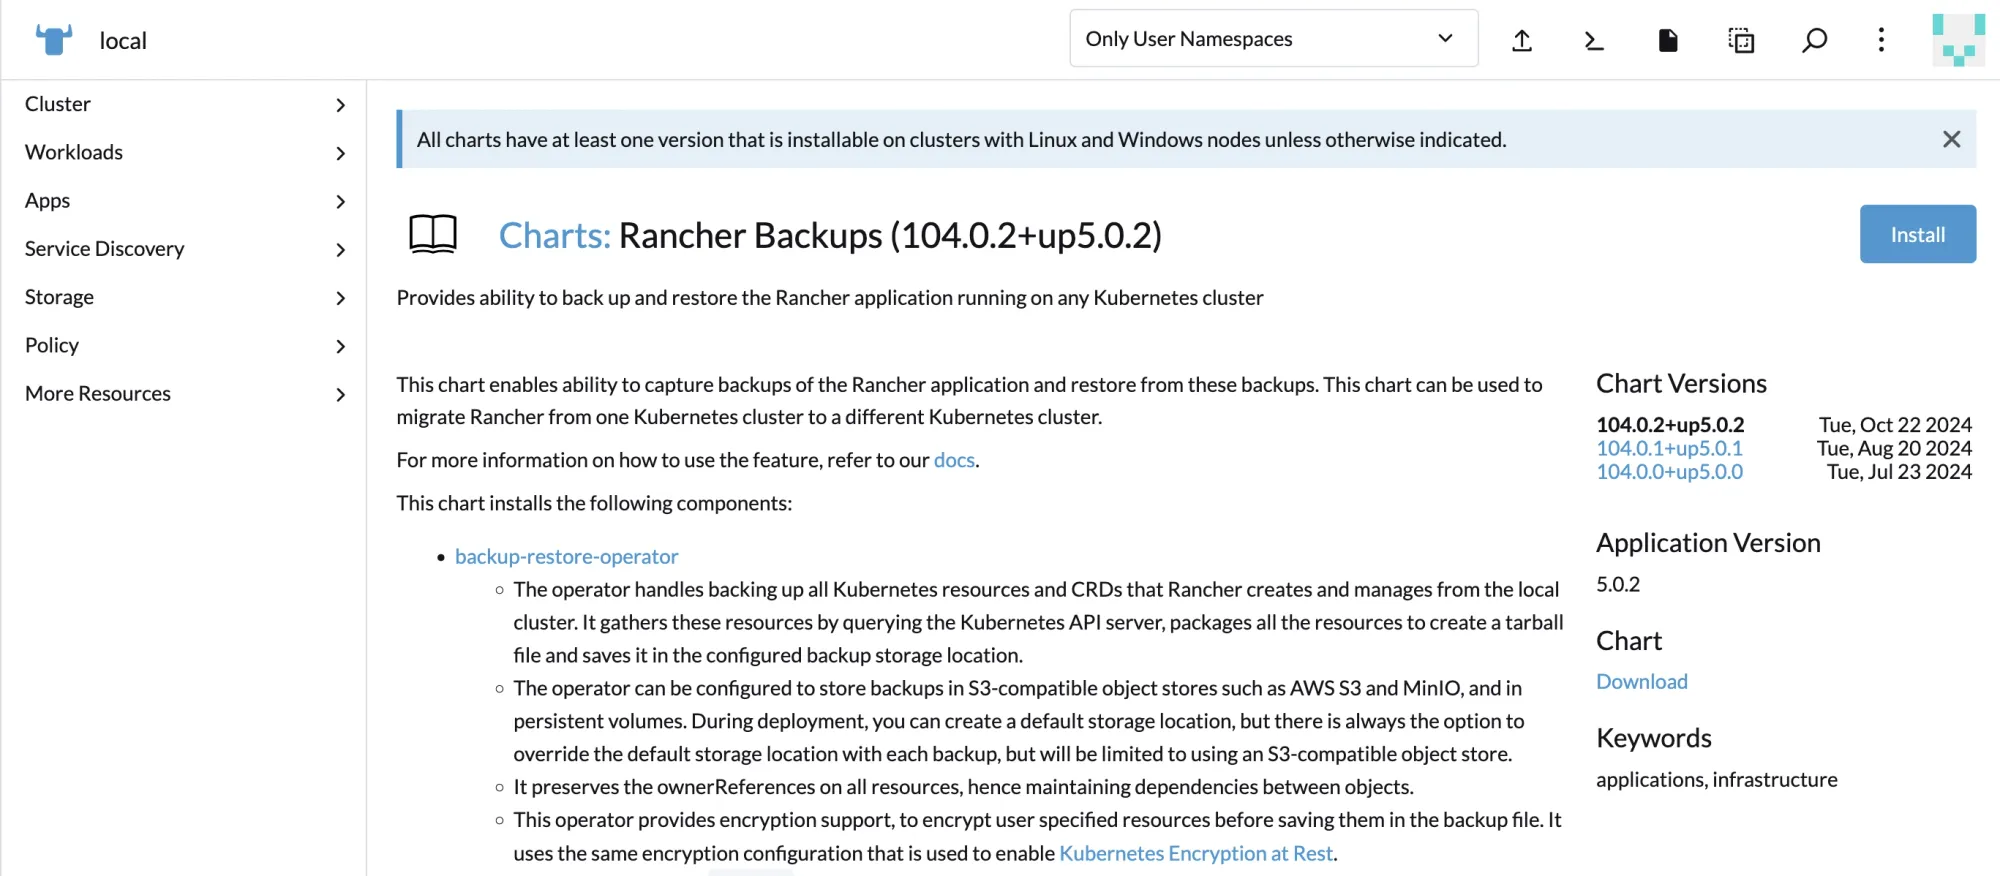
2. Installing the Backup Restore Operator (BRO)
Navigate to Apps → Charts → search for Rancher Backups → click Install.
Select the “Use an existing persistent volume” option, then choose the previously created rancher-backup Persistent Volume (PV) as shown below:


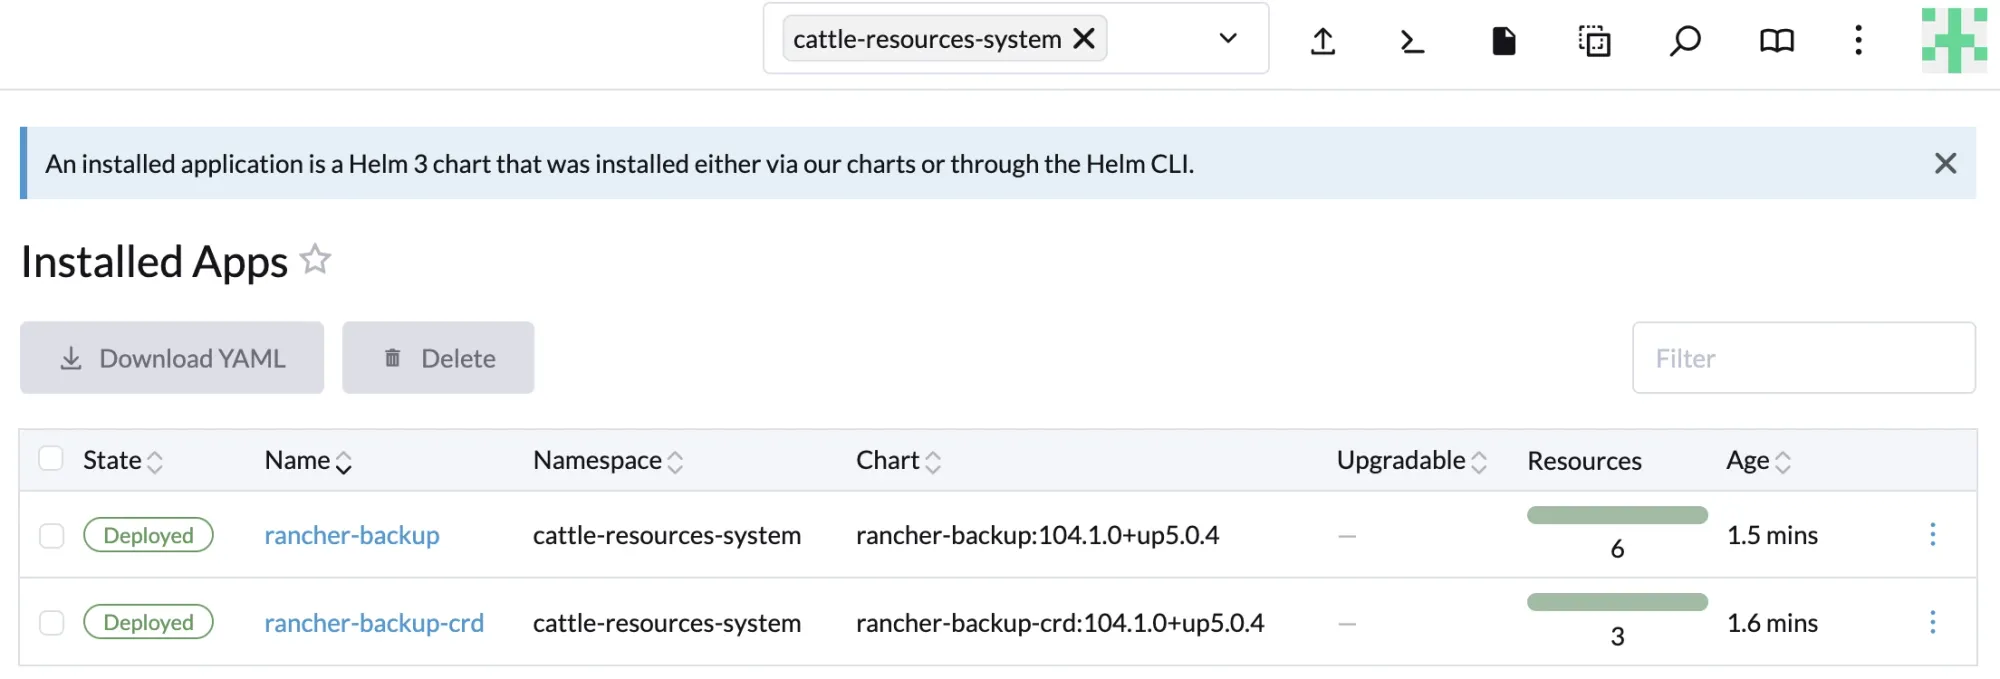
Click Install and wait for the installation to complete. This process installs two components:
- rancher-backup-crds
- rancher-backups
The CRDs (Custom Resource Definitions) extend the Kubernetes API and are required by Rancher Backups to create and restore backup resources.
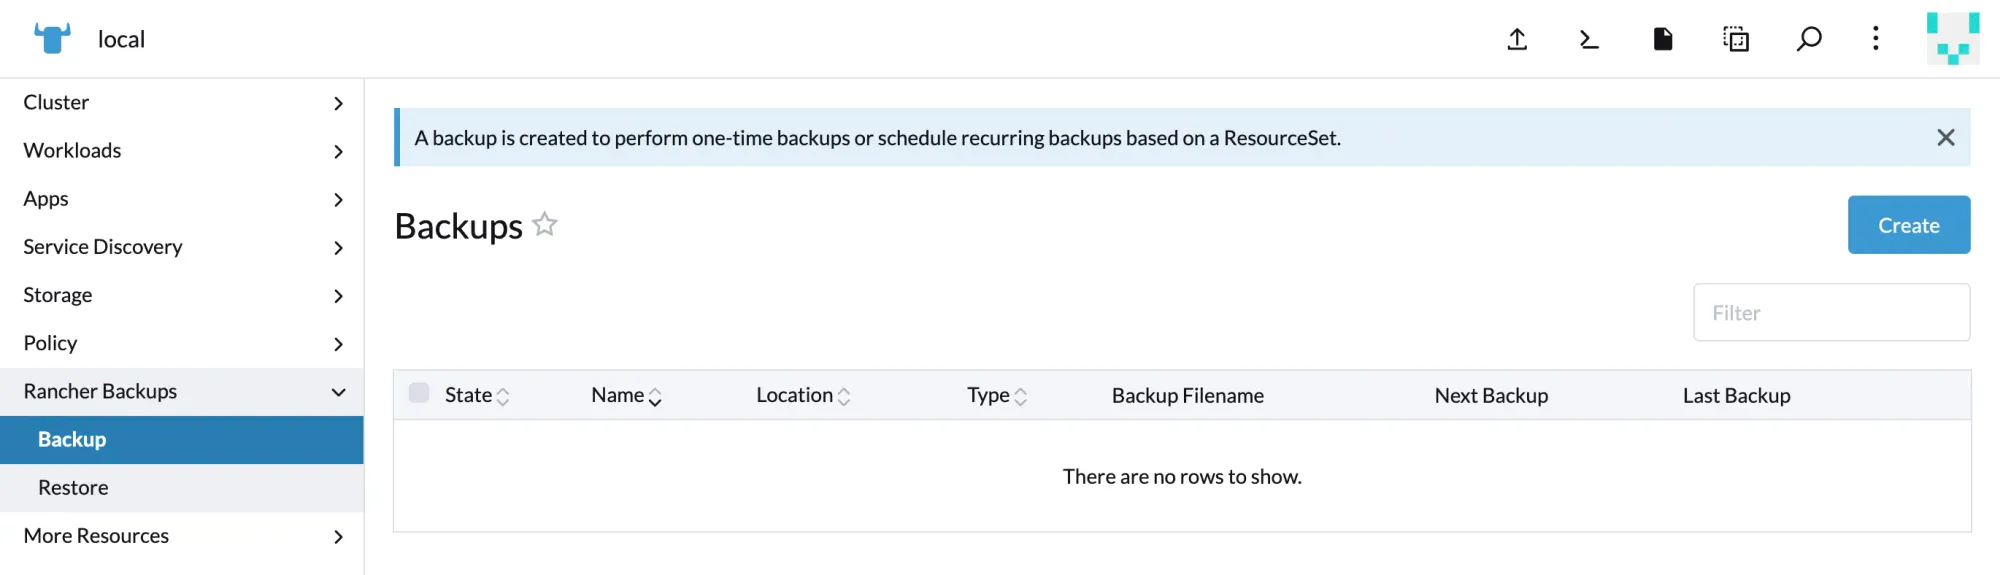
Creating a one-time backup using BRO (Backup Restore Operator)
- Since no backups exist yet, click Create to generate a new backup.
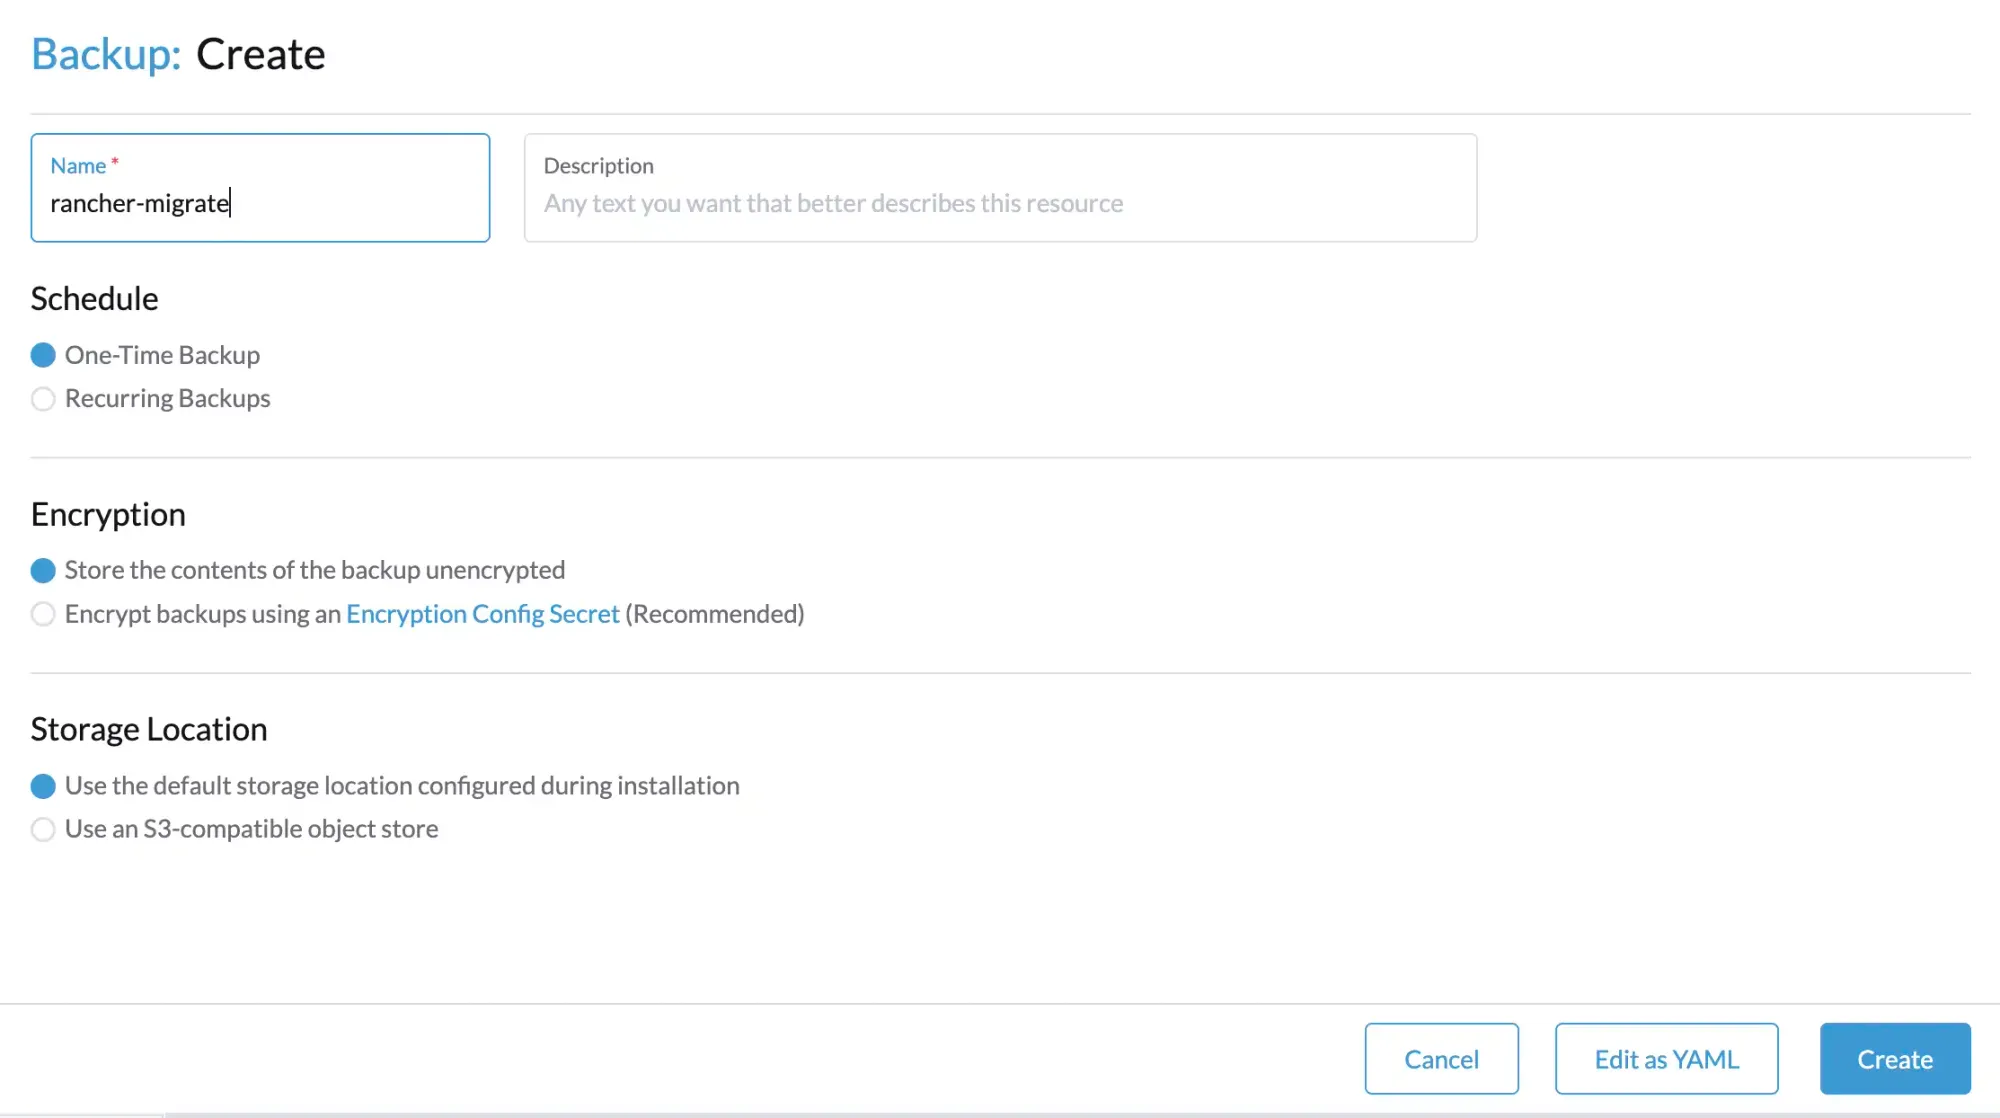
- Provide a backup name, for example
rancher-migrate, and optionally add a description.
- Set Schedule to One-Time Backup
- Set Encryption to Store the contents of the backup unencrypted (for simplicity during migration)
- Leave Storage Location as Use the default storage location configured during installation
If you are using an S3 bucket, there is no need to re-enter credentials. Click Create to start the backup job.
- After you hit create, you should be returning to the backup overview. Your Rancher migrate backup job should be visible and after a few moments the state should change to completed and a filename should show up.

Important: Copy the filename to a safe location, you’ll need it later.
rancher-backup-8610eb01-7e15-4de0-b4d9-8fc7ebf85331-2026-01-10T19-24-45Z.tar.gz
Extracting the BRO backup from the container for migration
If you’ve used the persistent volume method from this guide to perform your backup, you’ll have to perform this step. If you’ve used an S3 bucket, you can skip this entirely. If you used a different StorageClass, go download your backup from there.
- SSH into your host (docker rancher)
- Find your container or container-id using the command
sudo docker ps
docker cp rancher:/rancher-backup/rancher-backup-8610eb01-7e15-4de0-b4d9-8fc7ebf85331-2026-01-10T19-24-45Z.tar.gz .
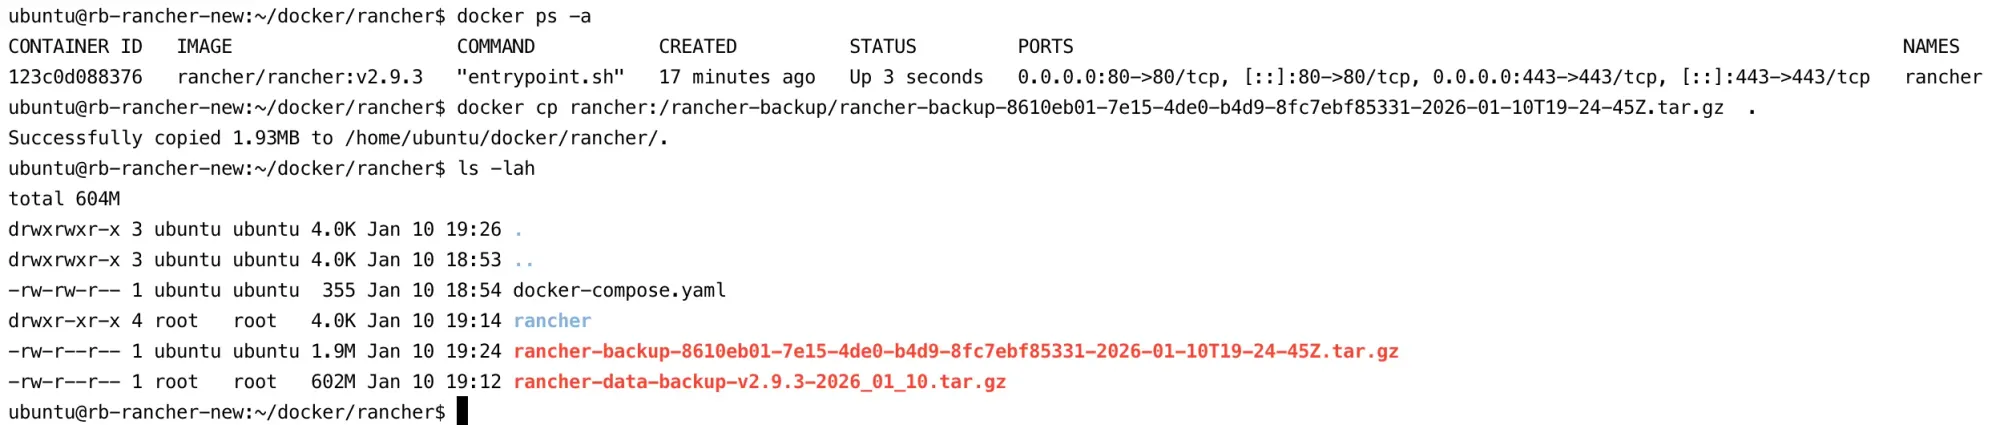
- Copy this file over to our local machine (worker nodes) using rsync or scp, just to be safe
Next to New Cluster section (Kubernetes)
Creating the Persistent Volume for Restore
- First, we need to create a persistent volume to store the backup data. This persistent volume must reside in the same namespace where the Backup Restore Operator (BRO) is installed. Therefore, both the namespace and the persistent volume must be created beforehand. Below is the YAML file used to create them:
---
apiVersion: v1
kind: Namespace
metadata:
  name: cattle-resources-system
---
apiVersion: v1
kind: PersistentVolume
metadata:
  name: rancher-backup
  namespace: cattle-resources-system
spec:
  storageClassName: manual
  capacity:
    storage: 10Gi
  accessModes:
    - ReadWriteOnce
  hostPath:
    path: /mnt/rancher

Installing the Backup Restore Operator (BRO)
- Add the
rancher-chartsHelm repository and update the repository index:
helm repo add rancher-charts https://charts.rancher.io
helm repo update
- Install the Custom Resource Definitions (CRDs) required by the Backup Restore Operator:
helm install rancher-backup-crd rancher-charts/rancher-backup-crd \
  -n cattle-resources-system \
  --create-namespace

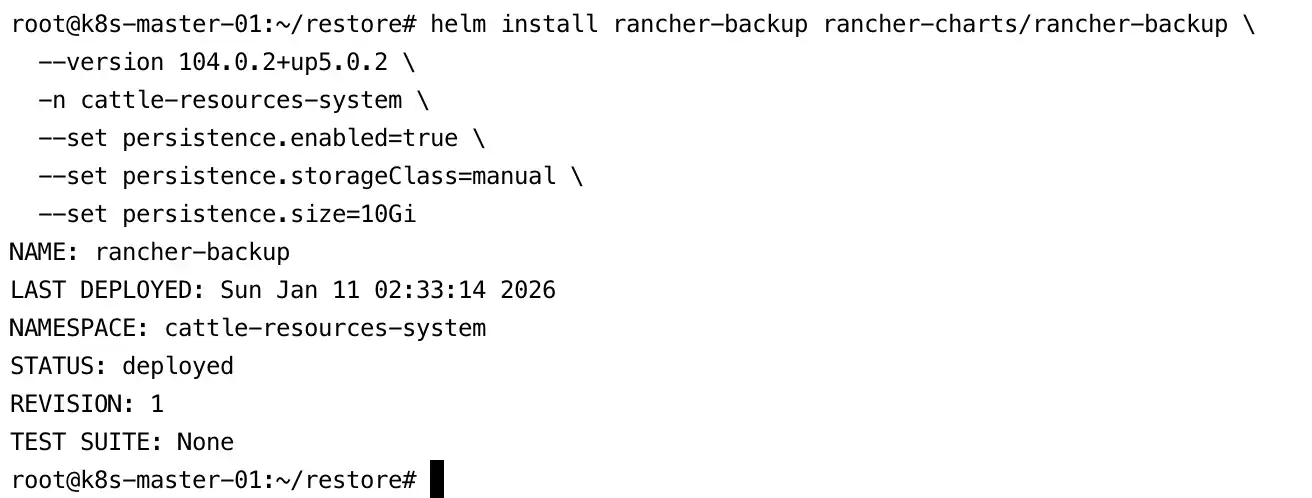
- Next, install the Backup Restore Operator itself using the persistent volume method:
helm install rancher-backup rancher-charts/rancher-backup \
  --version 104.0.2+up5.0.2 \
  -n cattle-resources-system \
  --set persistence.enabled=true \
  --set persistence.storageClass=manual \
  --set persistence.size=10Gi
Restoring the BRO Backup
- Copy the backup file to the worker node where the
rancher-backuppod is running.
scp -r [email protected]:~/docker/rancher/rancher-backup-xxxx.tar.gz /mnt/rancher


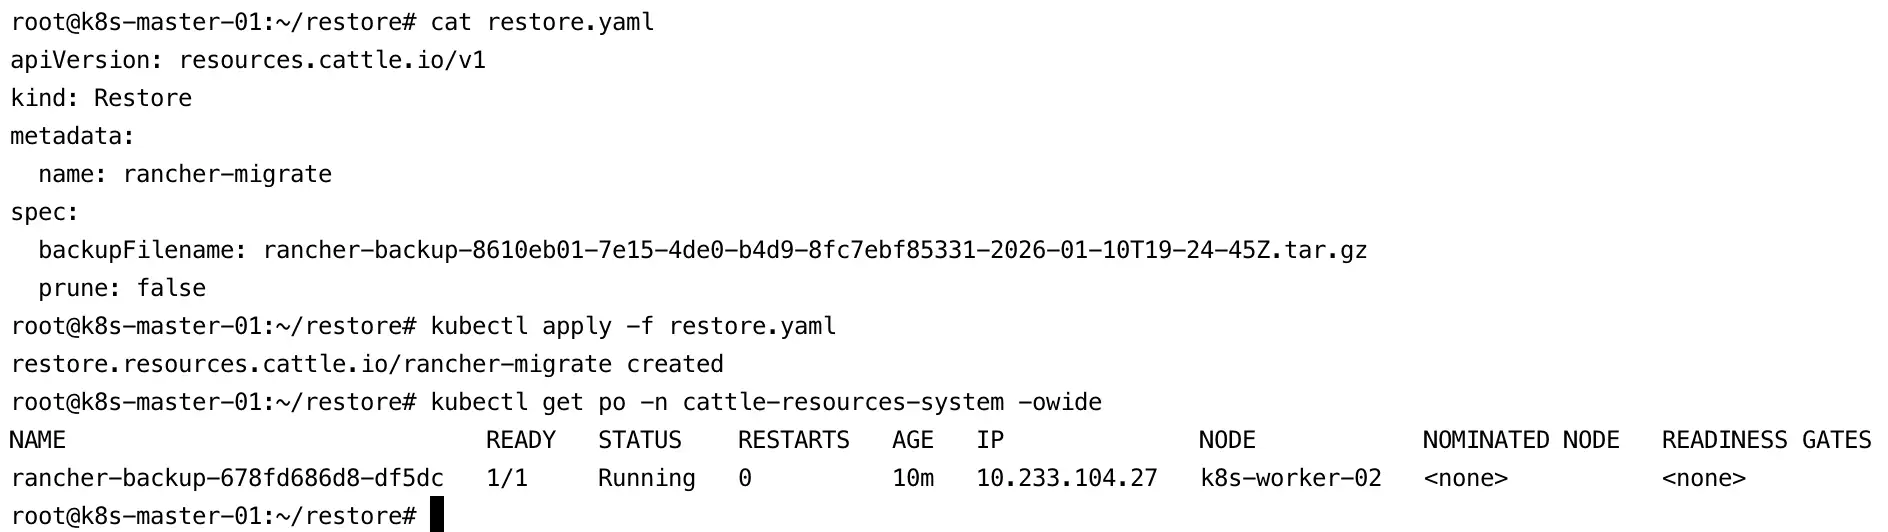
- Restore the backup from the persistent volume.
Replace the backup filename with your actual file name and save the manifest as restore.yaml.
Important: During a migration process, thepruneoption must be set tofalse, as shown in the example below.
apiVersion: resources.cattle.io/v1
kind: Restore
metadata:
  name: rancher-migrate
spec:
  backupFilename: rancher-migrate-xxxxxxx.tar.gz
  prune: false
- Check the restore process logs:
kubectl logs -n cattle-resources-system --tail 100 -f \
  -l app.kubernetes.io/instance=rancher-backup
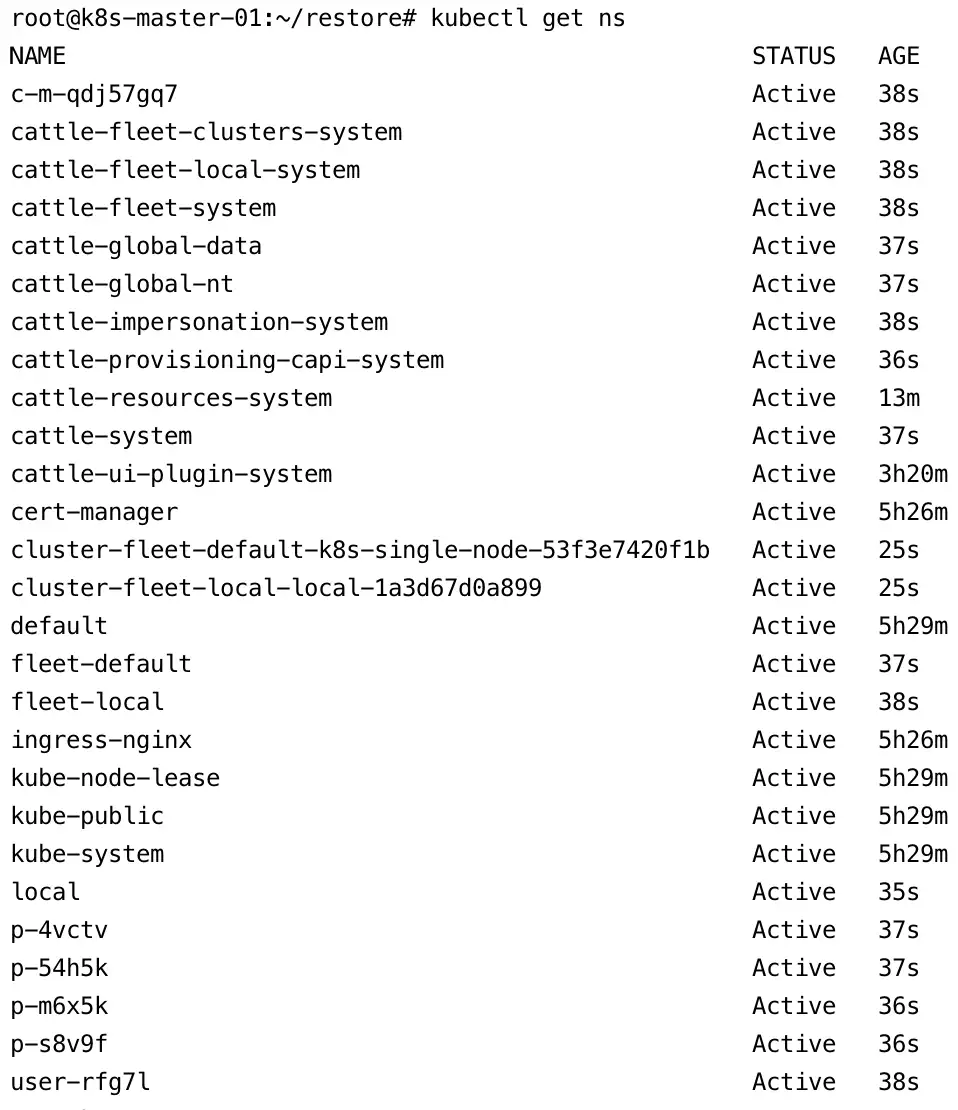
- After a few minutes, the restore process will complete and display the message
Done Restoring.

Important:
When migrating Rancher between any two different Kubernetes distributions (e.g. from K3s to RKE2), the object representing the local cluster has to be modified to allow Rancher to detect the new distribution. After the restoration is completed, and before bringing up Rancher on the new cluster, edit the local cluster object:
kubectl edit clusters.management.cattle.io local
- Change the value of
status.drivertoimported. - Remove
status.provider. - Remove the entire
status.versionmap. - Remove the label with the key
provider.cattle.ioinmetadata.labels. - Remove the annotation with the key
management.cattle.io/current-cluster-controllers-versioninmetadata.annotations. - Remove the entire
spec.rke2Configorspec.k3sConfigmap, if present. - Save the changes.
Note that removing spec.rke2Config or spec.k3sConfig will erase your distribution-specific upgrade configuration for the local cluster. It can be reconfigured if the new distribution is configurable for the local cluster.
Installing Rancher on the New Kubernetes Cluster
We are almost done. This is the final step before bringing our Rancher installation back online and ready to manage Kubernetes clusters again. Some post-installation housekeeping will follow, but this step marks the point where Rancher becomes operational on the new cluster.
1. Add the rancher-stable Helm Repository
Add the rancher-stable Helm repository. This repository is different from the Rancher charts used earlier for backup and restore.
helm repo add rancher-stable https://releases.rancher.com/server-charts/stable
helm repo update
2. Generate a Self-Signed SSL Certificate
In this lab environment, a self-signed SSL certificate will be used. Therefore, we need to generate the SSL certificates manually.
a. Create the OpenSSL Configuration File
cat > rancher-openssl.cnf <<'EOF'
[ req ]
default_bits       = 4096
prompt             = no
default_md         = sha256
distinguished_name = dn
x509_extensions    = v3_req

[ dn ]
C  = ID
ST = Jakarta
L  = Jakarta
O  = BYAMRI
OU = IT
CN = rancher.byamri.local

[ v3_req ]
subjectAltName = @alt_names
keyUsage = digitalSignature, keyEncipherment
extendedKeyUsage = serverAuth

[ alt_names ]
DNS.1 = rancher.byamri.local
EOF
b. Generate the Private Key
openssl genrsa -out rancher.key 4096
c. Generate the Self-Signed Certificate (Valid for 10 Years)
openssl req -x509 -new -nodes \
  -key rancher.key \
  -sha256 \
  -days 3650 \
  -out rancher.crt \
  -config rancher-openssl.cnf
d. Verify the Certificate
openssl x509 -in rancher.crt -text -noout


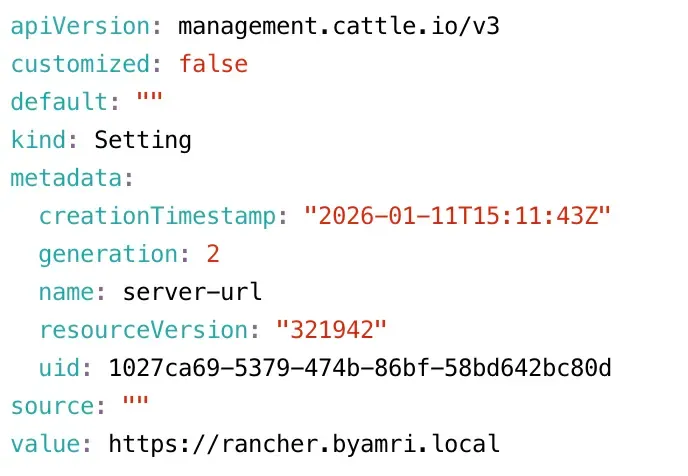
3. Update Rancher Server URL (IP to Domain)
Before installing Rancher, update the Rancher server URL to use a domain name instead of an IP address. Edit the value field as shown below:
kubectl -n cattle-system edit settings server-url
4. Install Rancher on Kubernetes Using a Self-Signed Certificate
Refer to the official documentation:
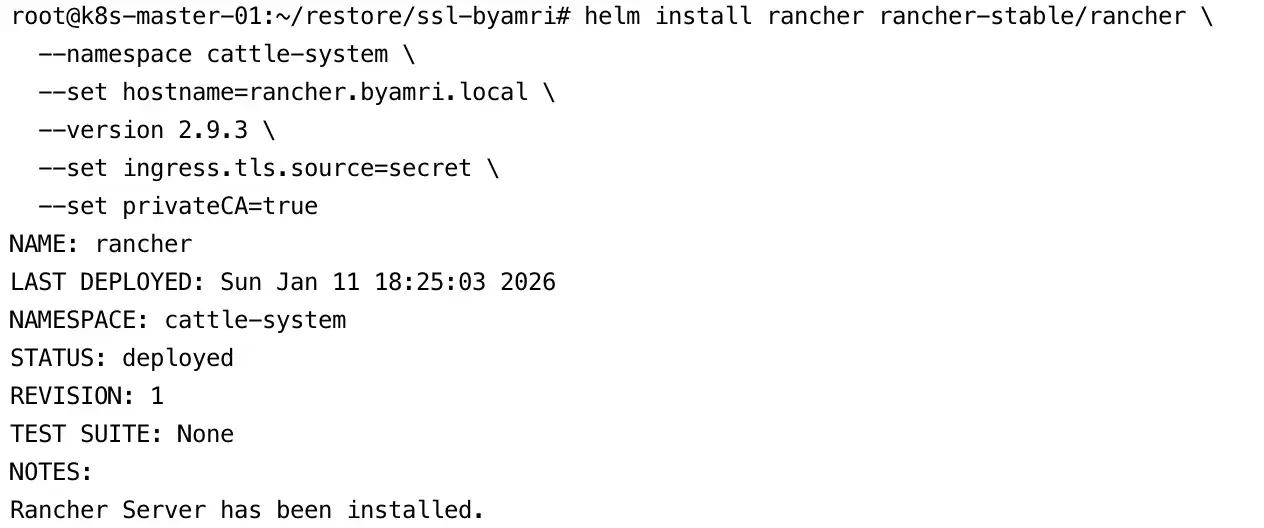
Install Rancher using Helm with TLS configured from Kubernetes secrets:
helm install rancher rancher-stable/rancher \
  --namespace cattle-system \
  --set hostname=rancher.byamri.local \
  --version 2.9.3 \
  --set ingress.tls.source=secret \
  --set privateCA=true
5. Create TLS Secrets for Rancher
Create the TLS secret for the Rancher ingress:
kubectl -n cattle-system create secret tls tls-rancher-ingress \
  --cert=tls.crt \
  --key=tls.key

Create the CA certificate secret:
kubectl -n cattle-system create secret generic tls-ca \
  --from-file=cacerts.pem

6. Restart the Rancher Deployment
Finally, restart the Rancher deployment to apply all configuration changes:
kubectl rollout restart deployment rancher -n cattle-system

Rancher is now successfully installed on the new Kubernetes cluster, and it will automatically detect the restored data from the previous backup, completing the migration process.
Almost Done!
Now it’s time to switch the traffic to the new Rancher cluster.
1. Redirect Traffic to the New Cluster
After the migration is complete, update your DNS records so that traffic is directed to the new Rancher instance.
Make sure to use the same hostname that was configured as the server-url in the original Rancher cluster.
2. Log in to Rancher HA
Log in to the Rancher HA environment and ensure that you remember the credentials used to access the Rancher UI.

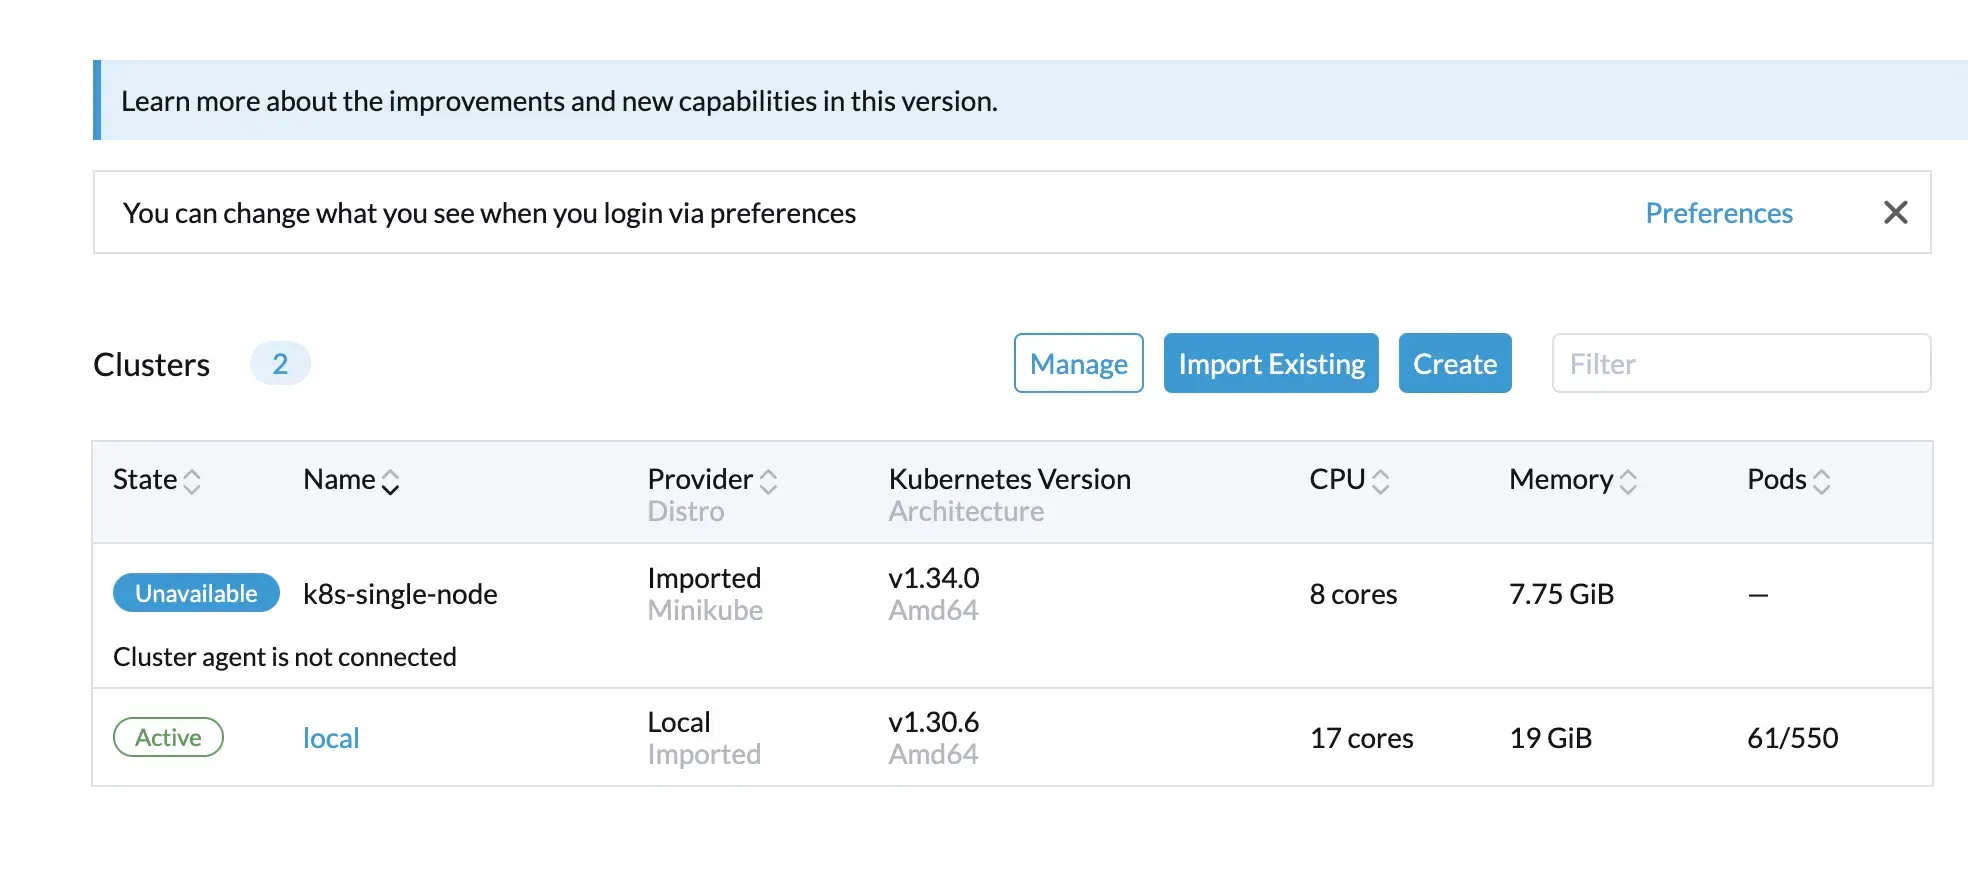
3. Re-register the Existing Cluster
After logging in, the previously imported cluster will appear in an Unavailable state. This happens because the Kubernetes agent was originally registered using an IP address.
To fix this:
- Navigate to Cluster Management → select the affected cluster.
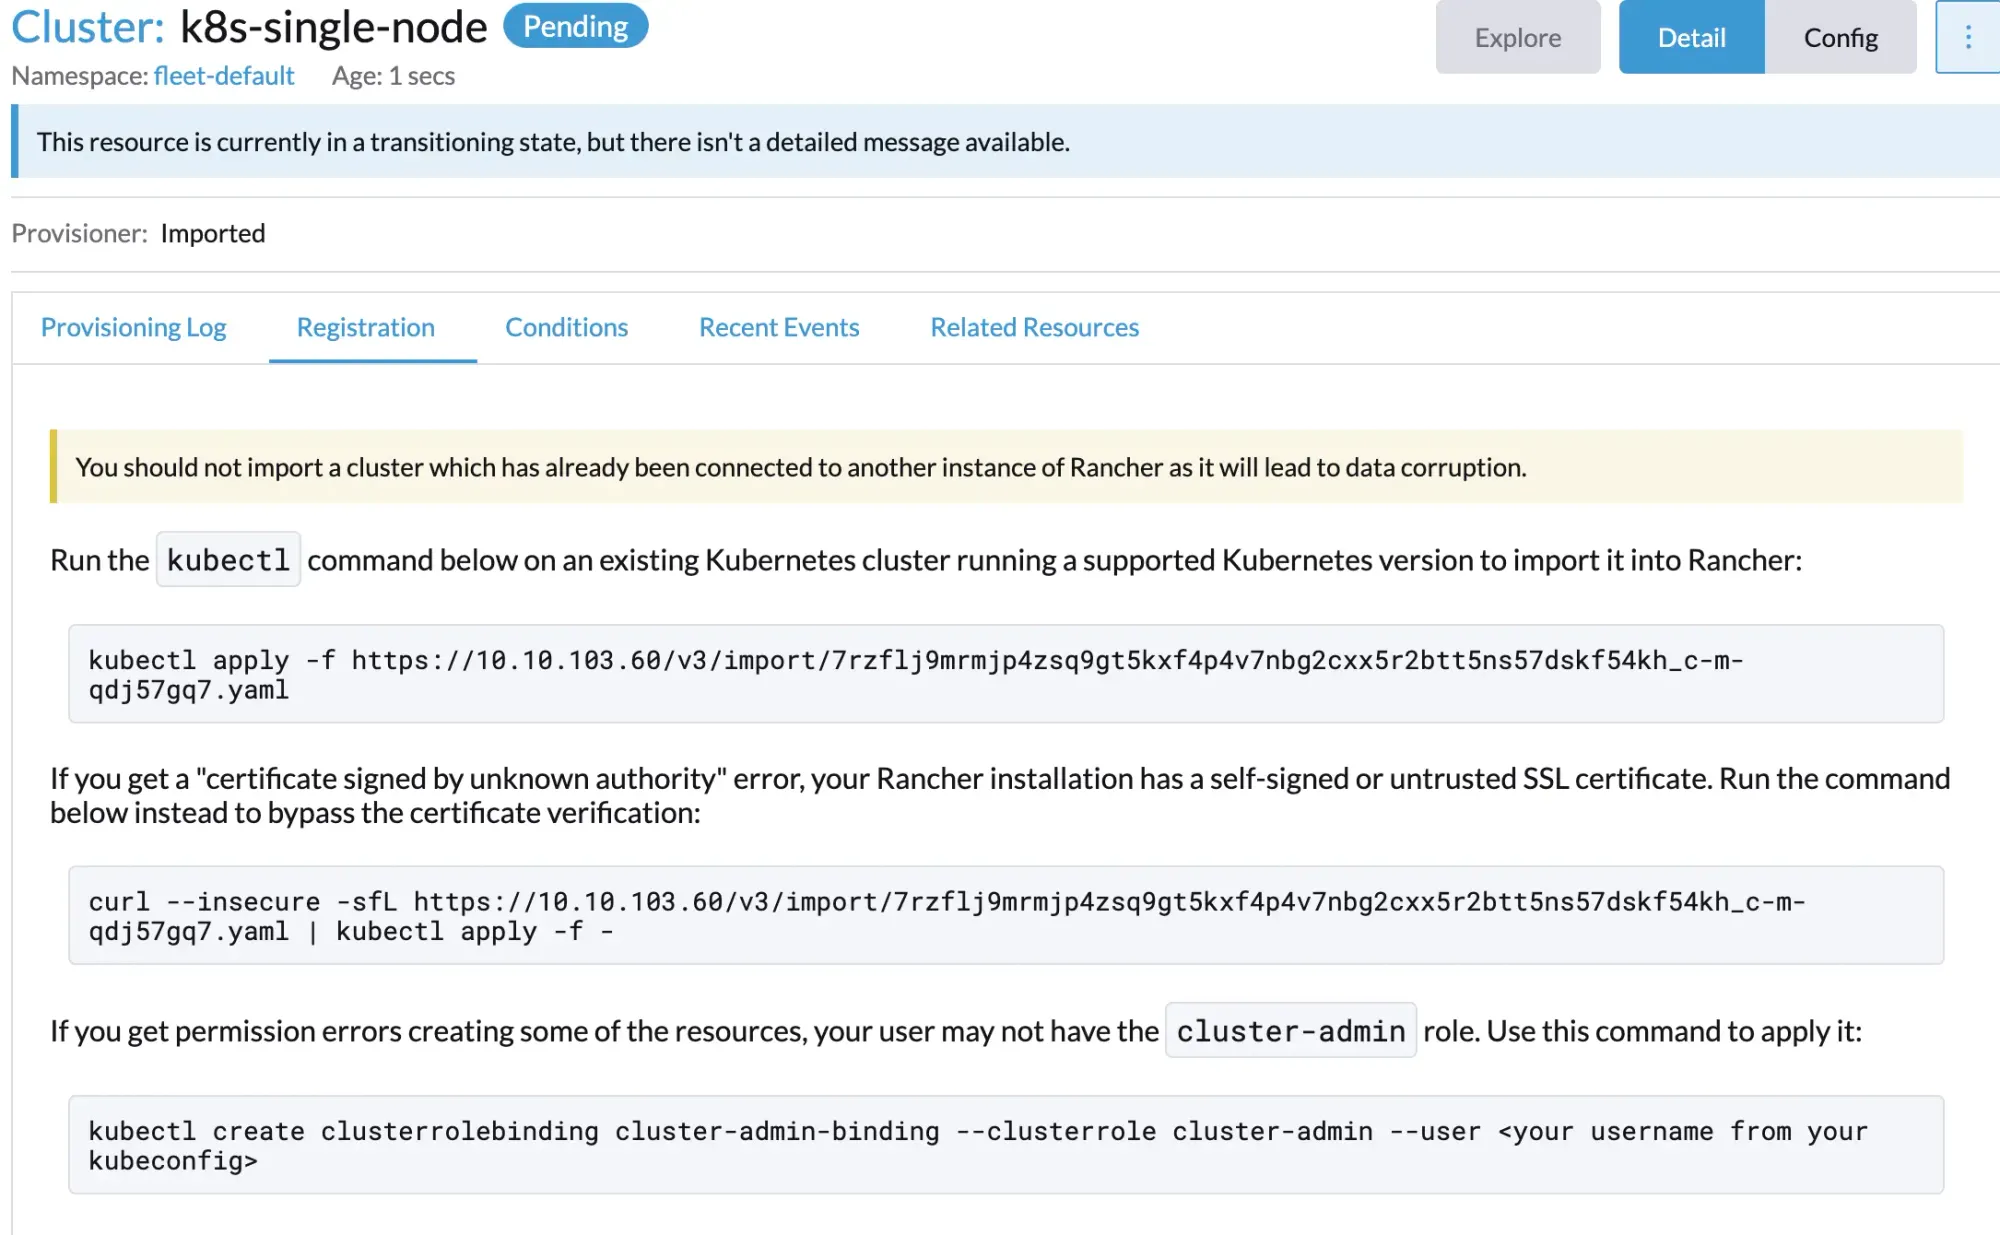
- Copy the re-registration command provided by Rancher.
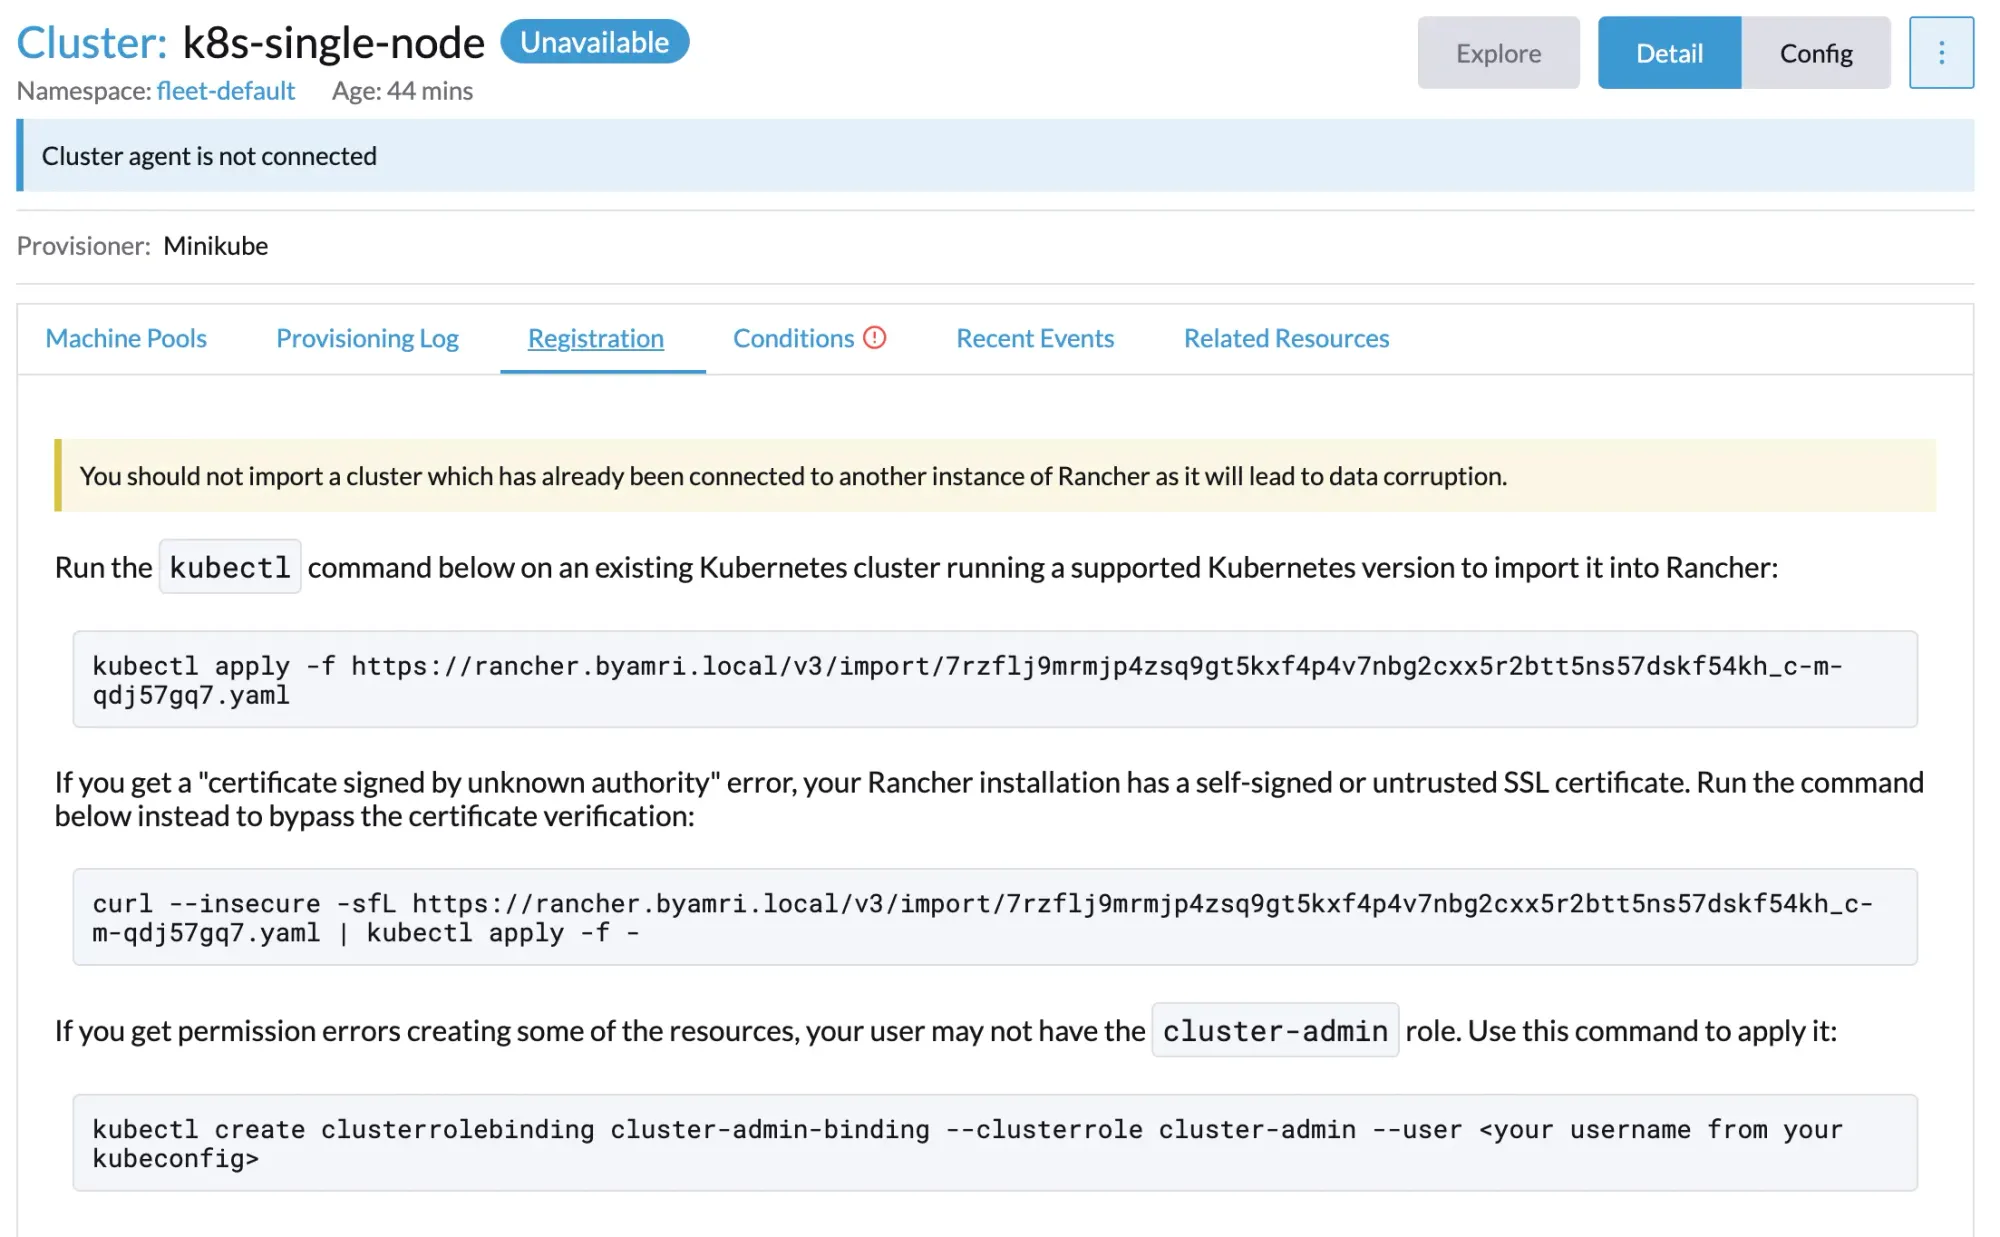
After copying the command, you will see a screen similar to the following:

4. Verify Pod Status
Ensure that all required pods are running successfully:

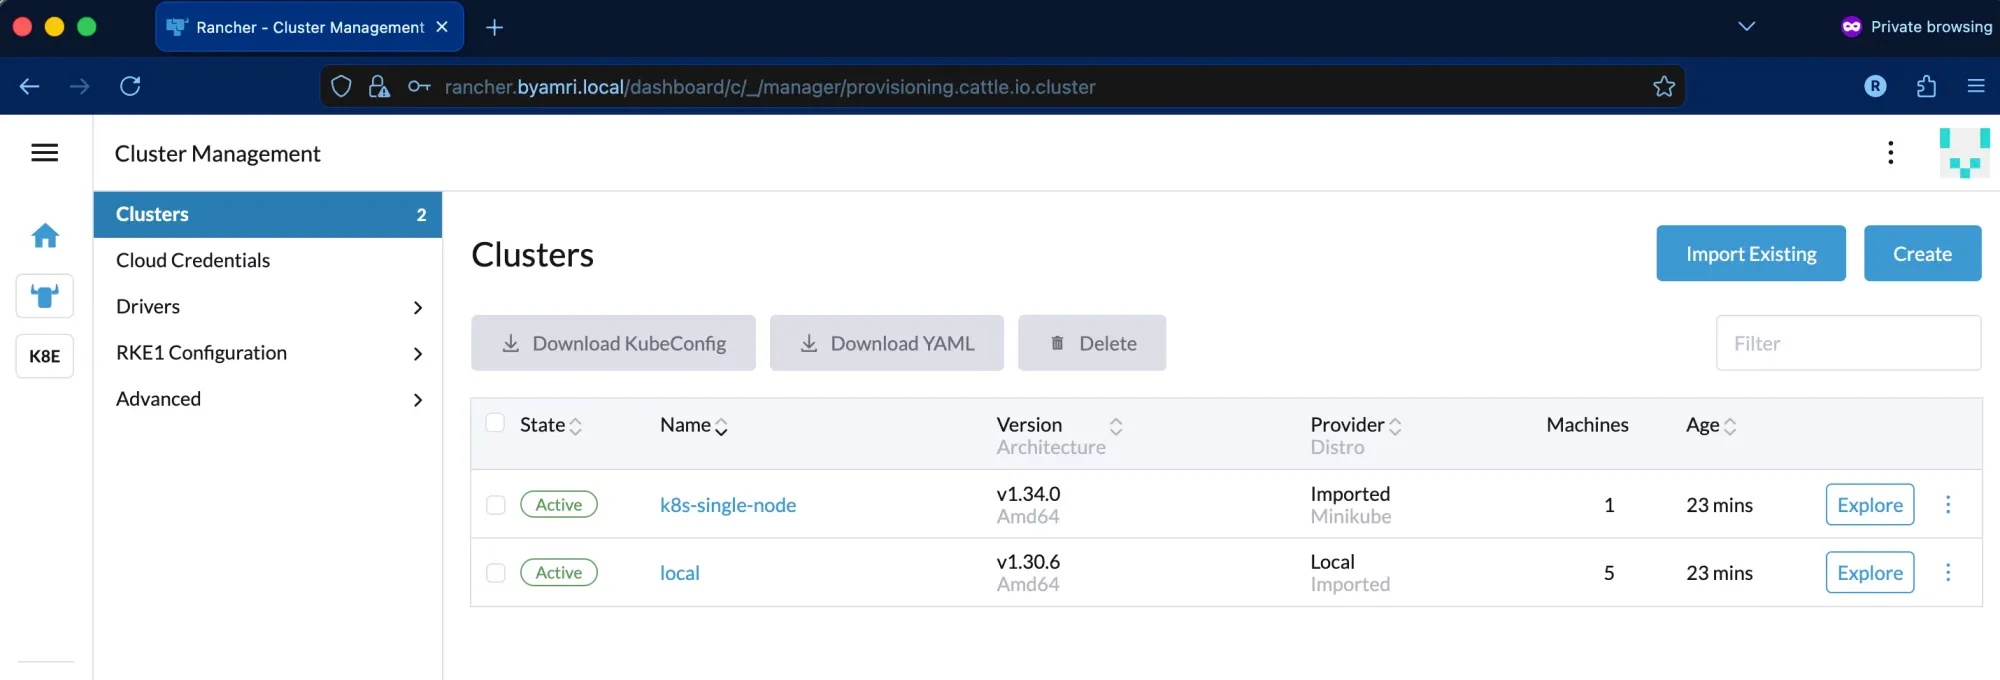
5. Confirm Cluster Status
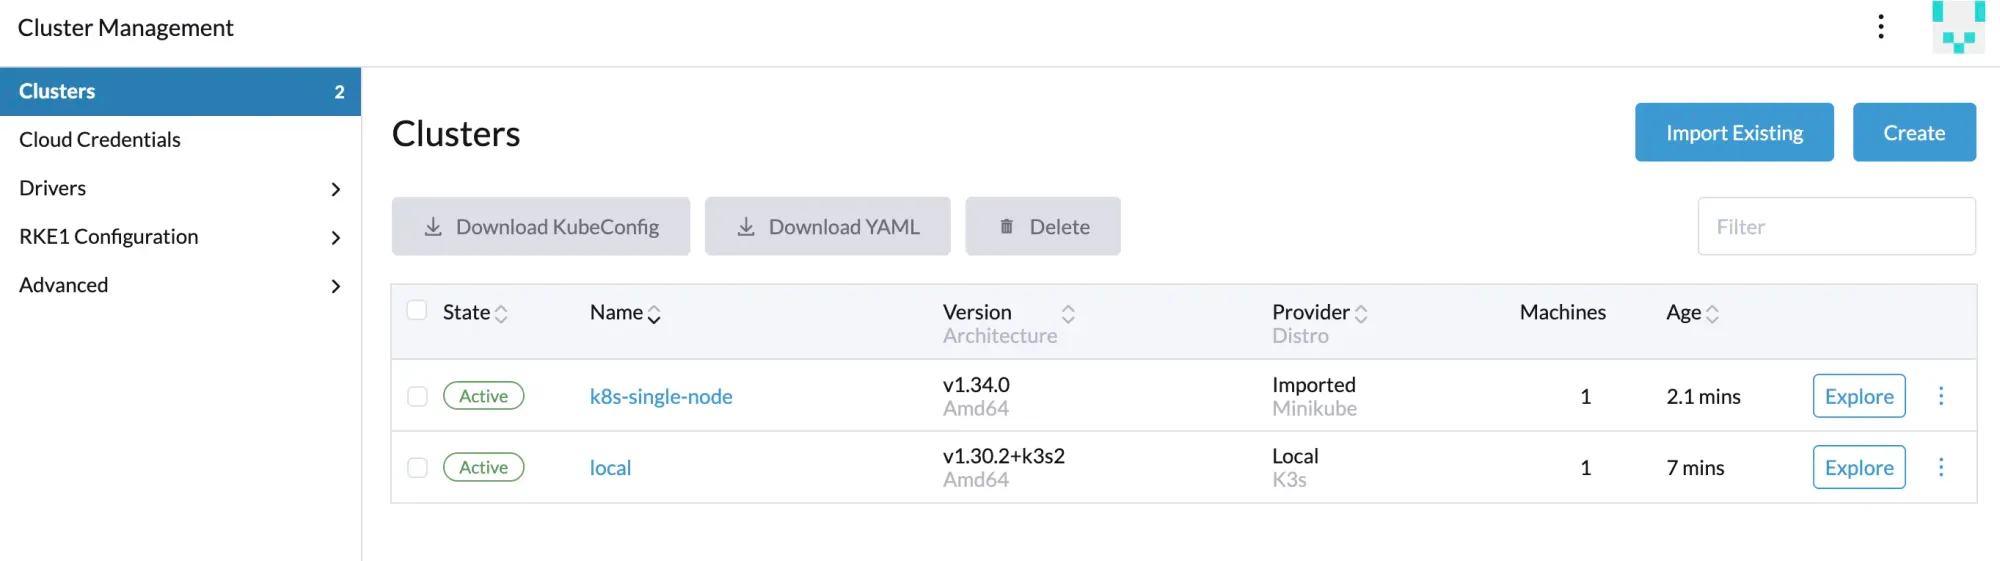
Once the agent reconnects successfully, the cluster status should change back to Active.

Additional Notes (Self-Signed Certificate Handling)
Since this setup uses a self-signed SSL certificate, the agent re-registration process may occasionally get stuck. To prevent this issue, the Rancher CA certificate must be trusted by the node.
1. Install the Rancher CA Certificate on the Node
Copy the Rancher CA certificate to the system trust store and update the certificates:
cp cacerts.pem /usr/local/share/ca-certificates/rancher.crt
update-ca-certificates
2. Restart the Cluster Agent Deployment
Restart the cluster agent to apply the trusted CA configuration:
kubectl -n cattle-system rollout restart deployment cattle-cluster-agent
Migration Complete!
Your Rancher HA environment is now fully operational, all clusters are reconnected, and traffic has been successfully switched to the new Kubernetes-based Rancher deployment.
Refference: